1
Find plugins inside Creative Cloud
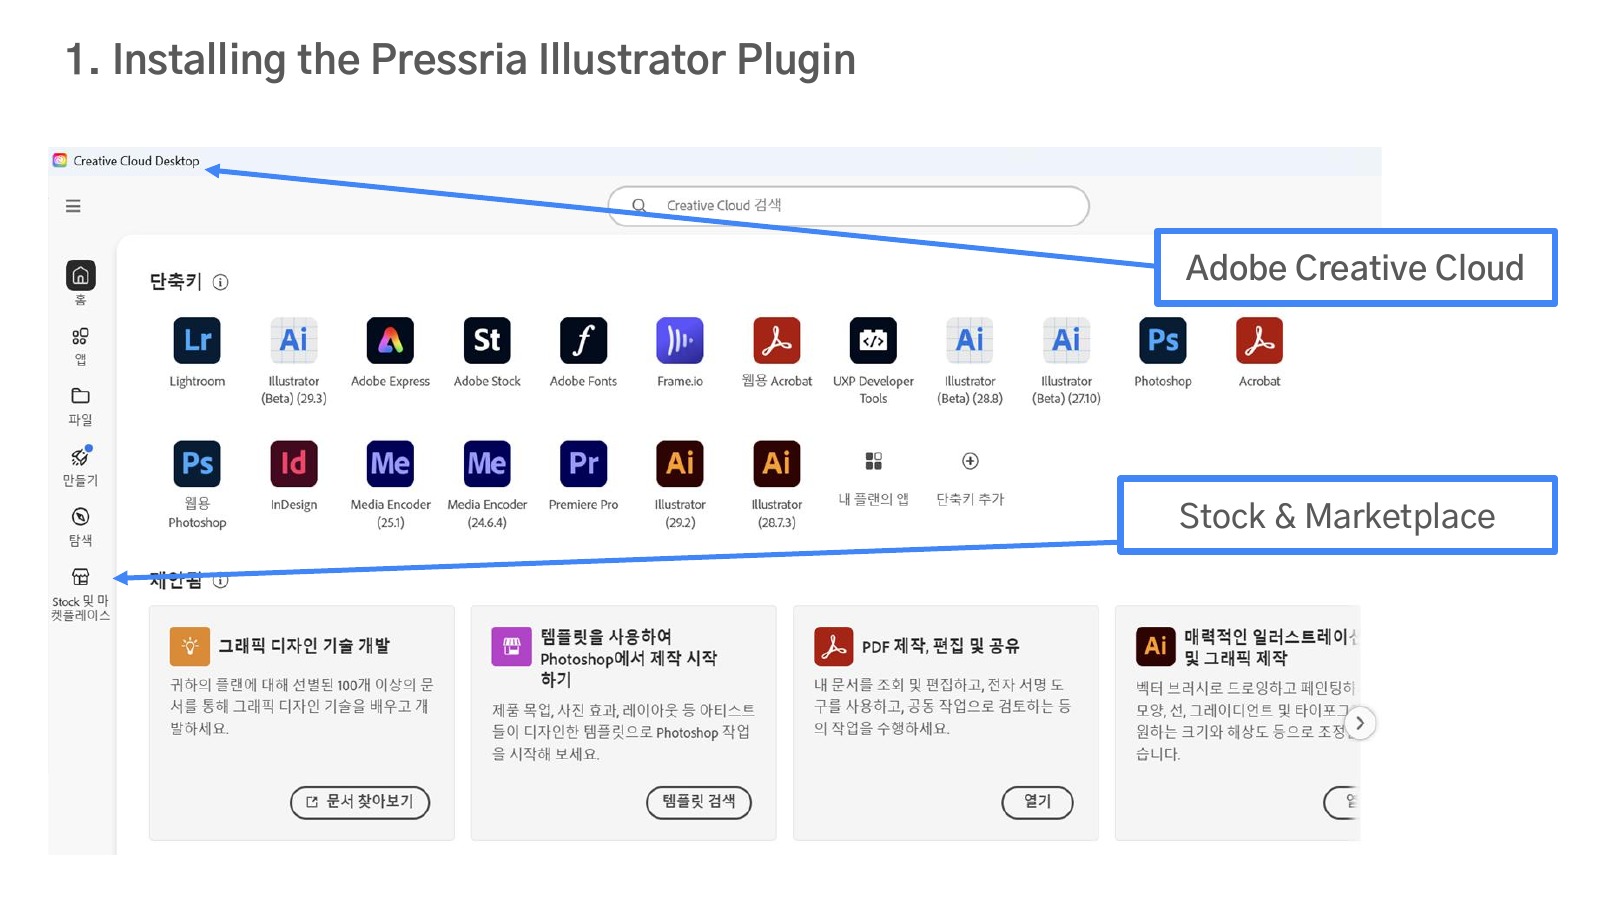
Open the Creative Cloud Desktop app. Plugins are searched for from the "Stock & Marketplace" tab in the left-hand menu.
A step-by-step walkthrough from installing the Illustrator plugin to product editor setup, content uploads, and downloading order PDFs.
Open the Creative Cloud Desktop app. Plugins are searched for from the "Stock & Marketplace" tab in the left-hand menu.
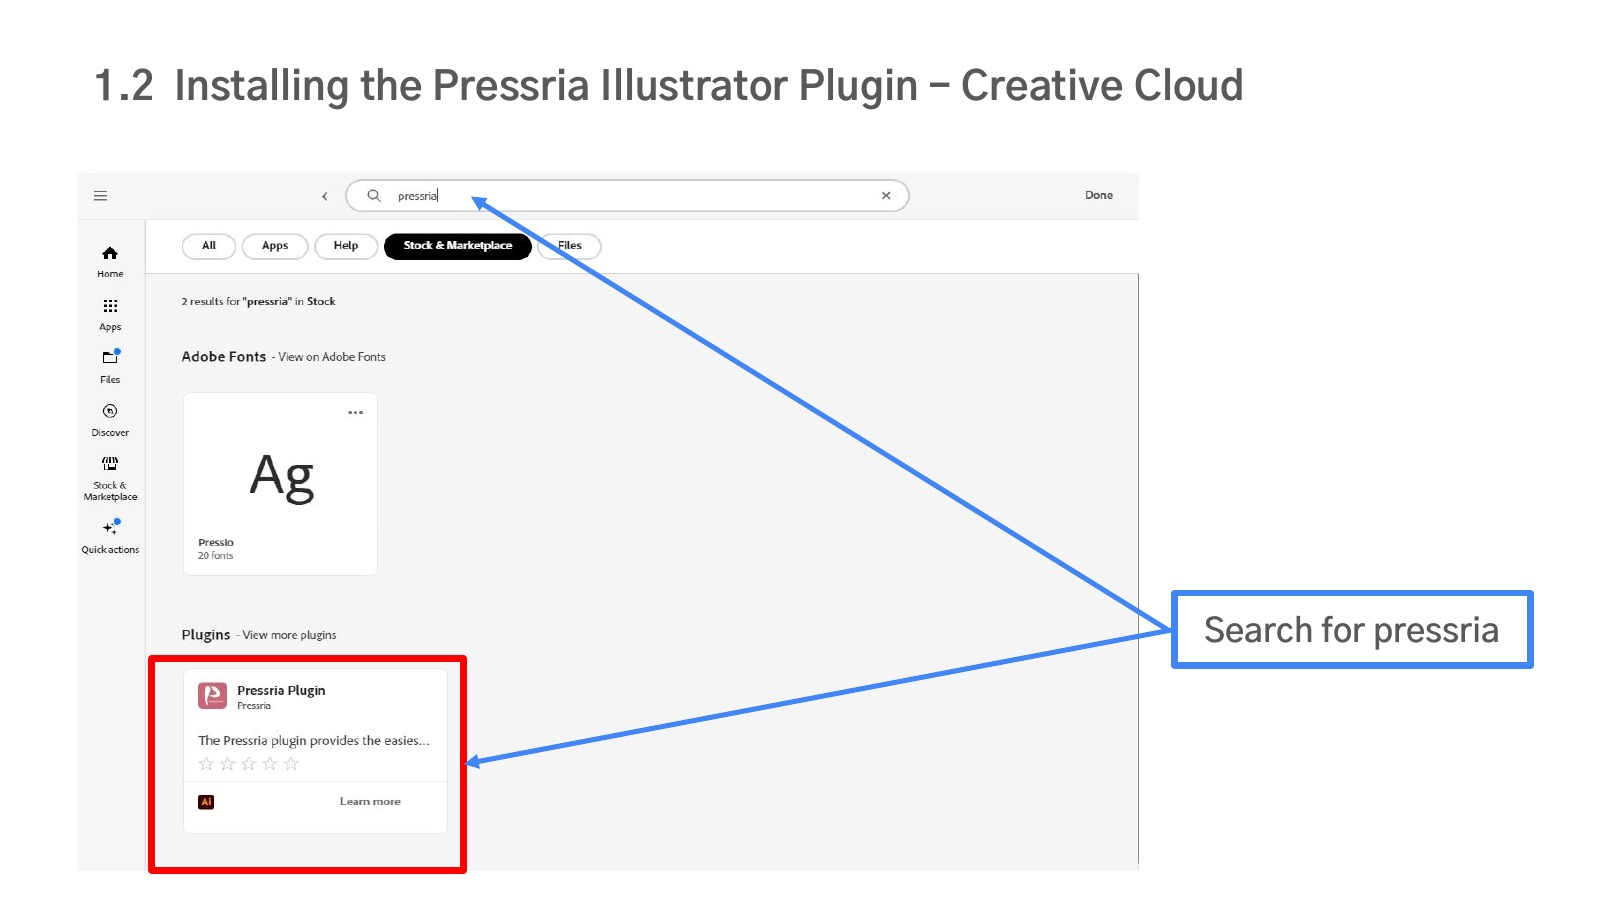
In the Stock & Marketplace search box, type “pressria”.
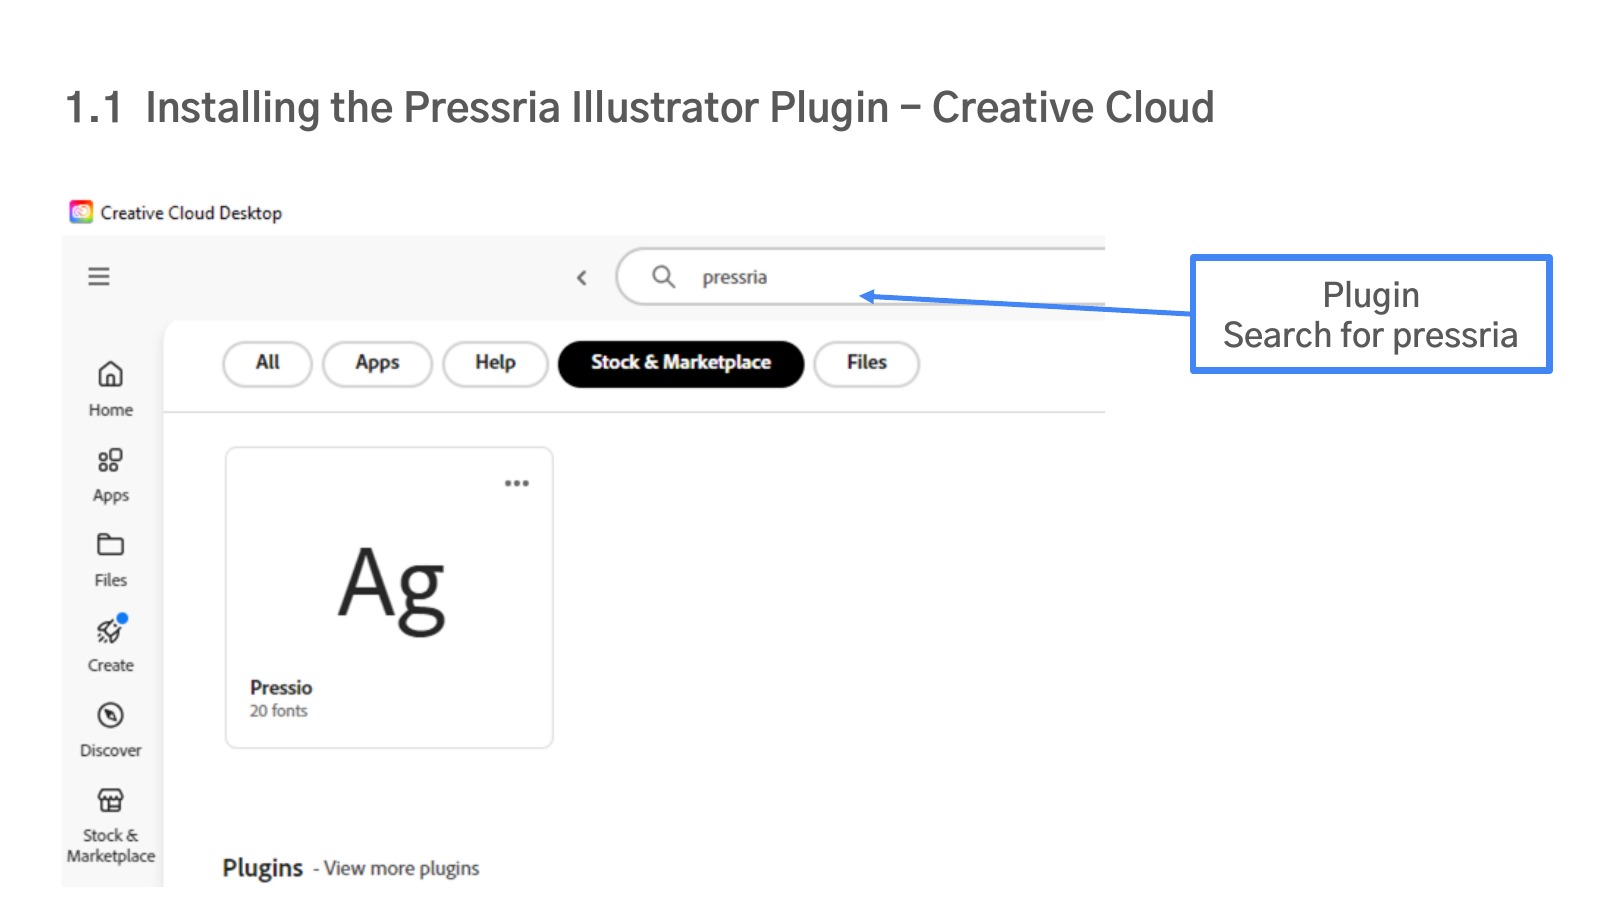
Under the Plugins section, choose “Pressria Plugin”. (Don’t confuse it with the “Pressio” font listed under Adobe Fonts.)
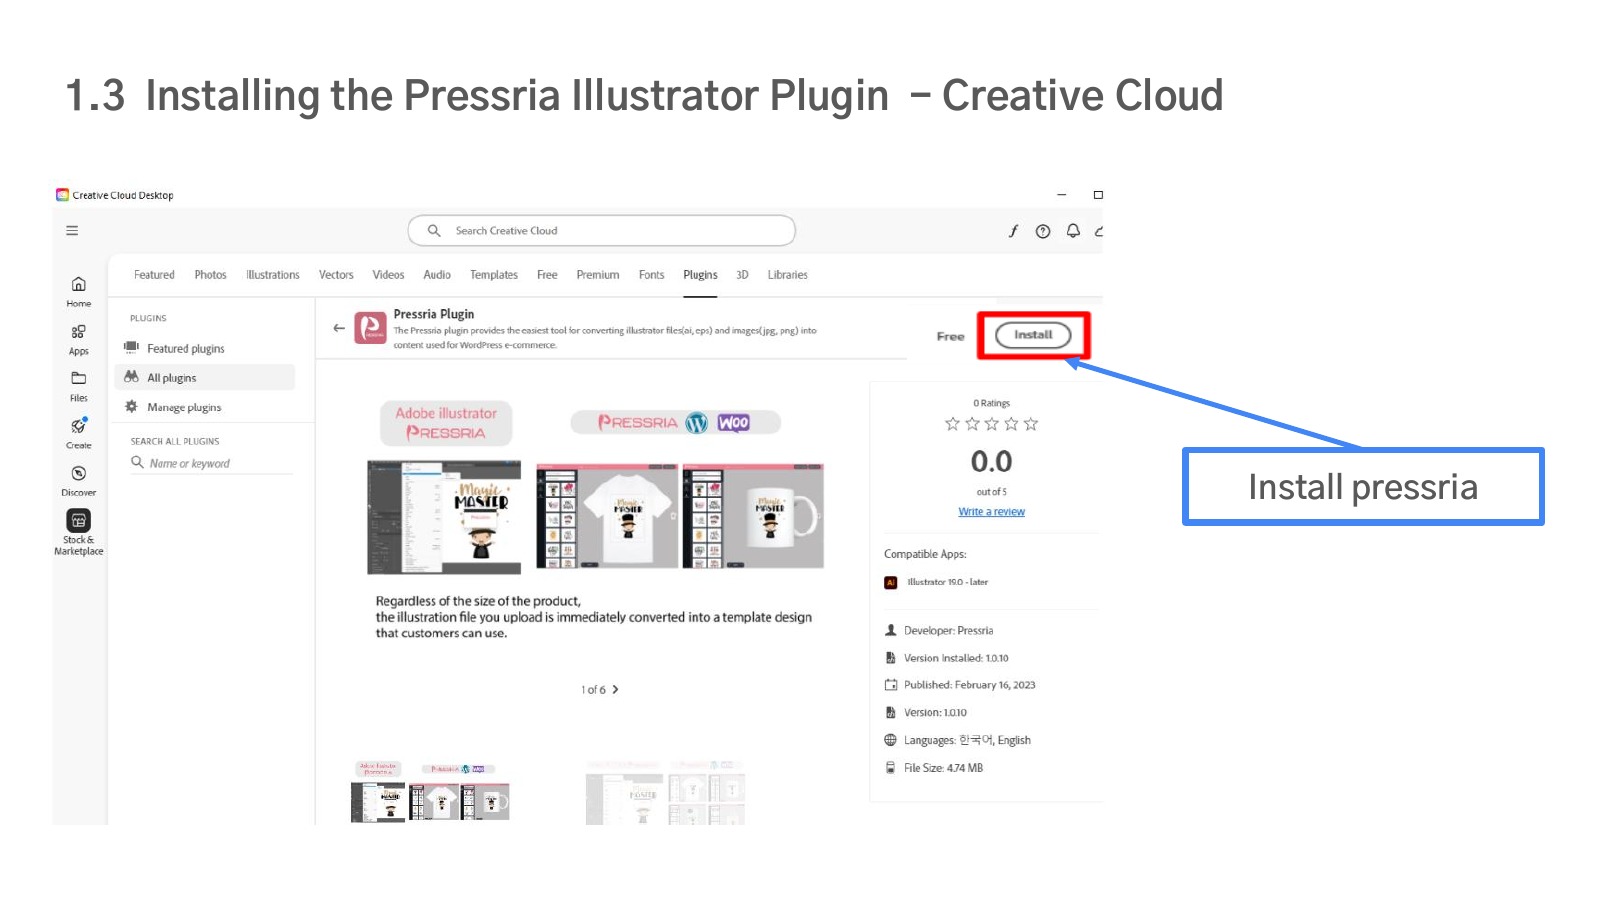
On the plugin detail page, click the Install button to install it.
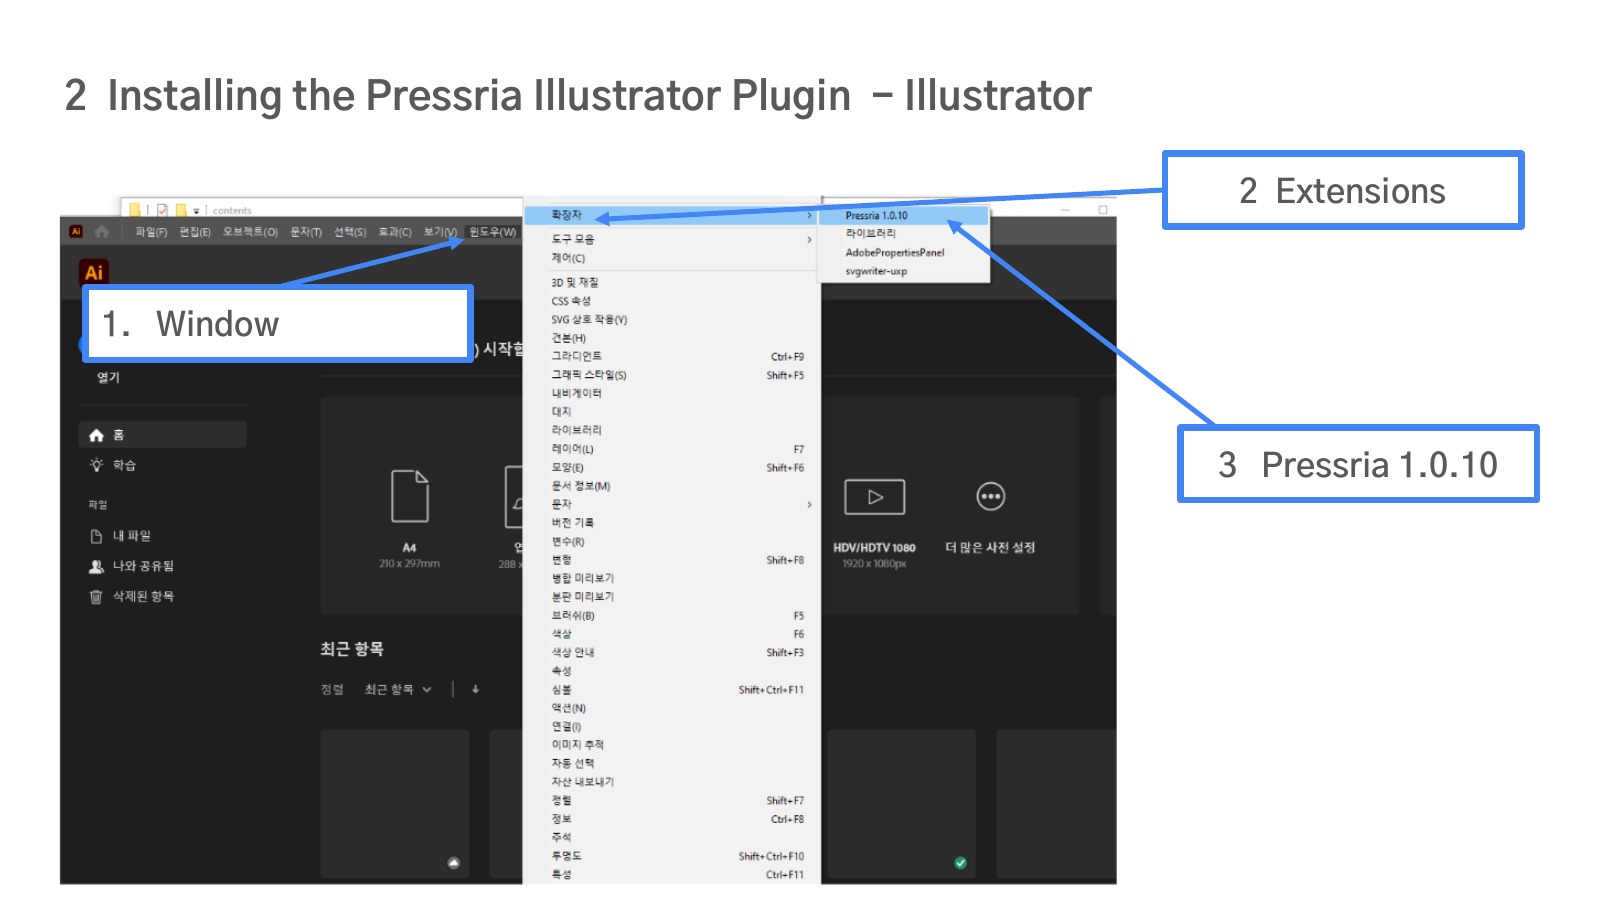
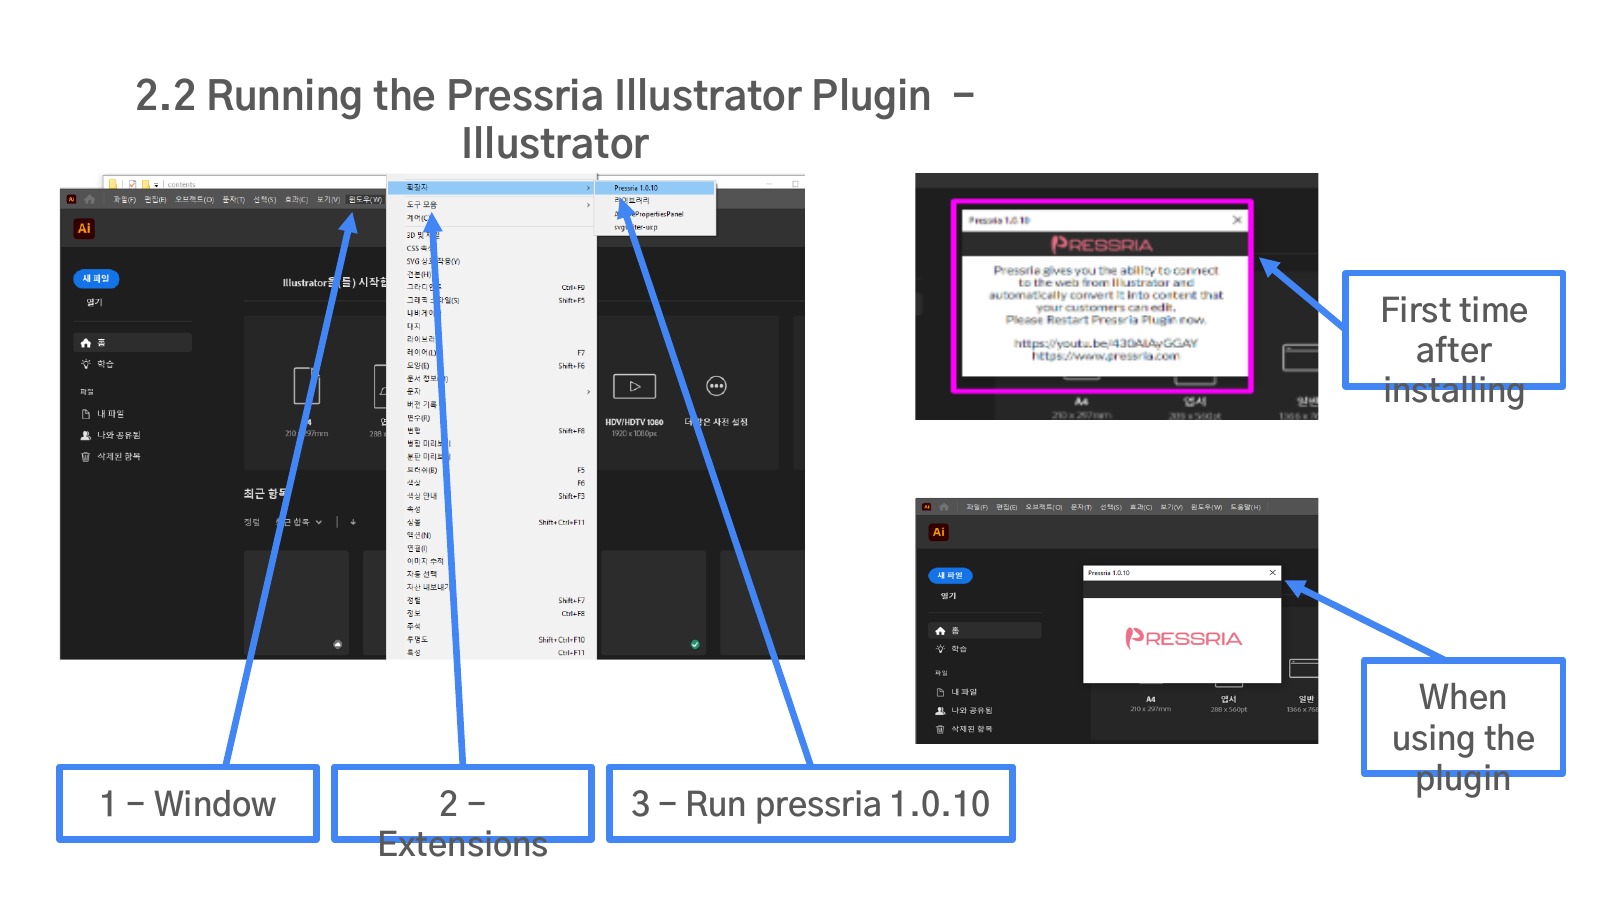
From Illustrator’s top menu, go to Window → Extensions → Pressria 1.1.17.
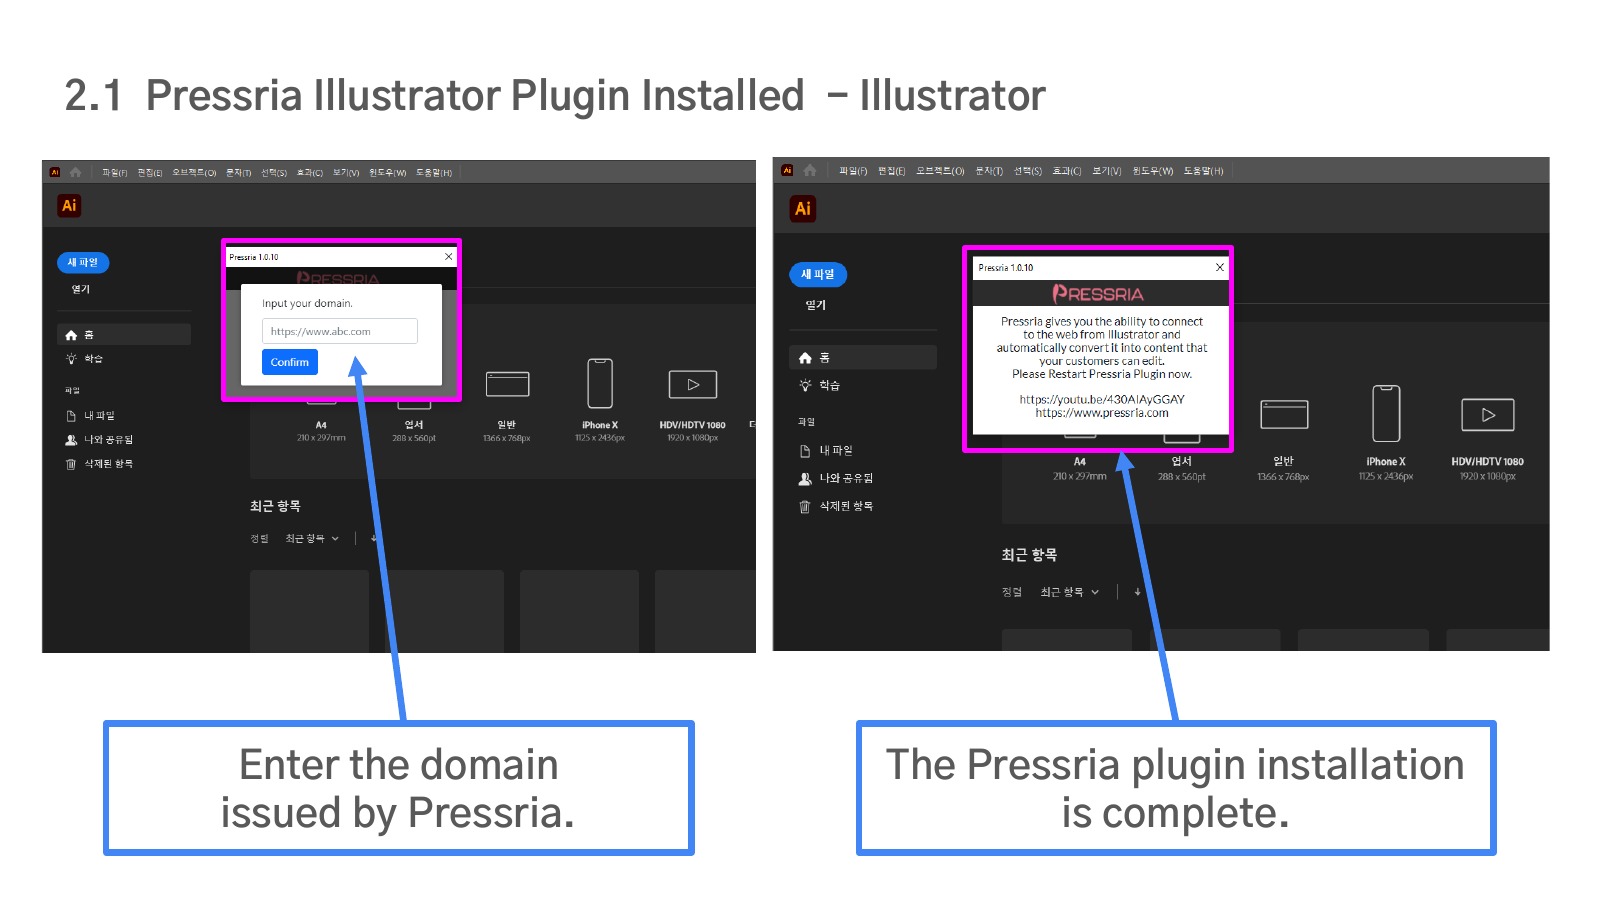
On the first launch, a domain input dialog appears. Enter the domain issued by Pressria and click Confirm to finish setup.
From now on, opening the same menu path shows the Pressria logo screen, confirming the plugin is connected.
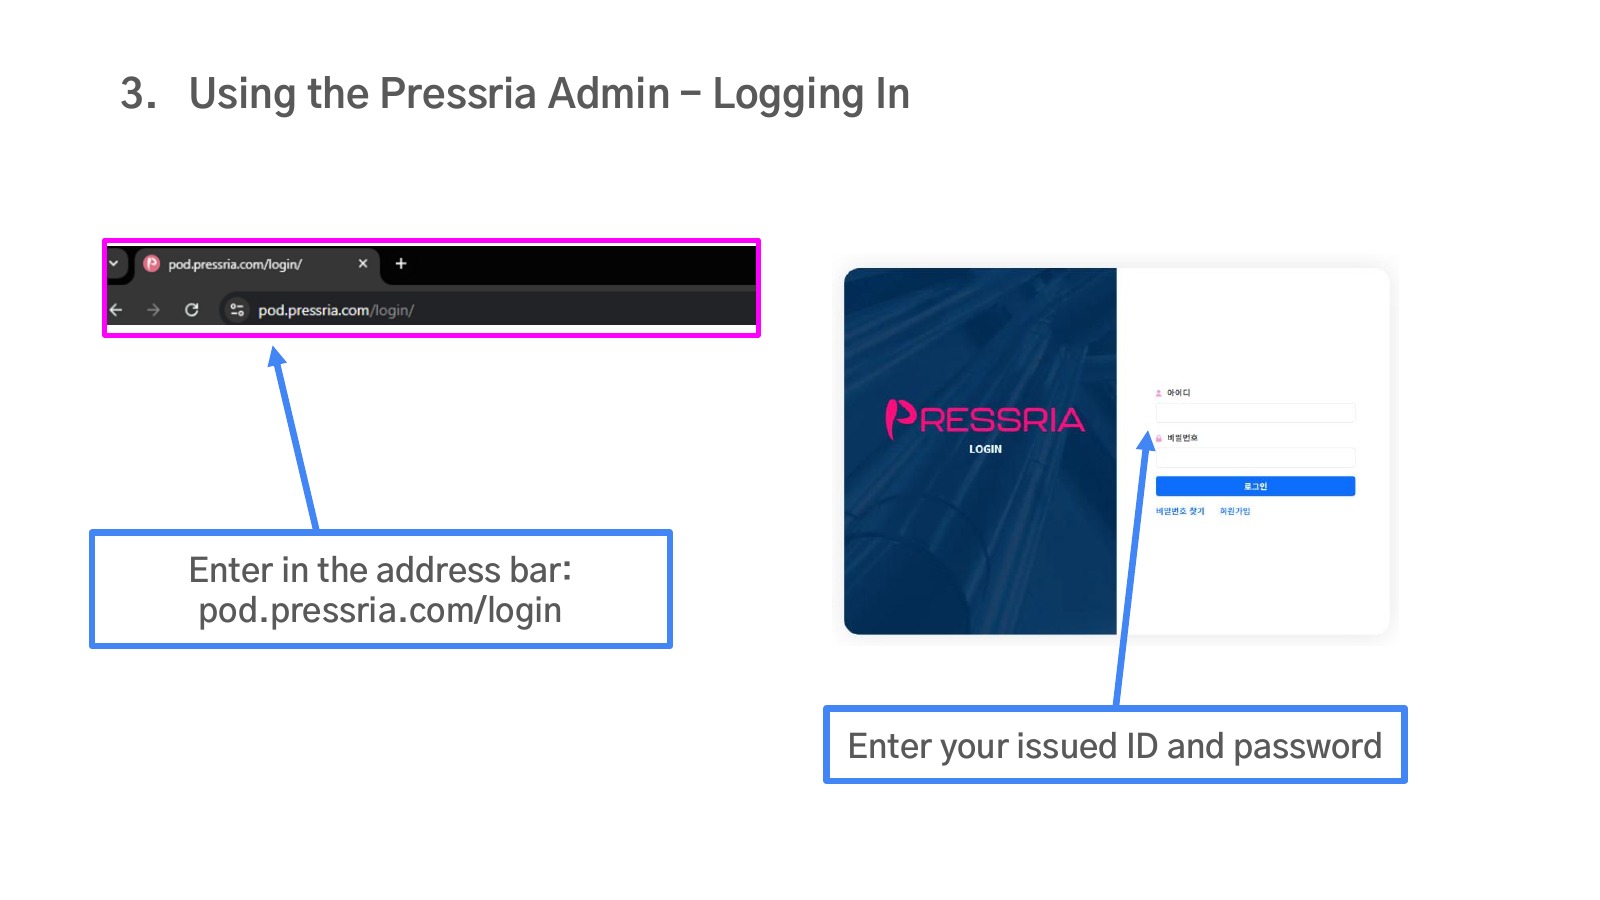
Go to pod.pressria.com/login in your browser, then sign in with the ID and password you were issued.
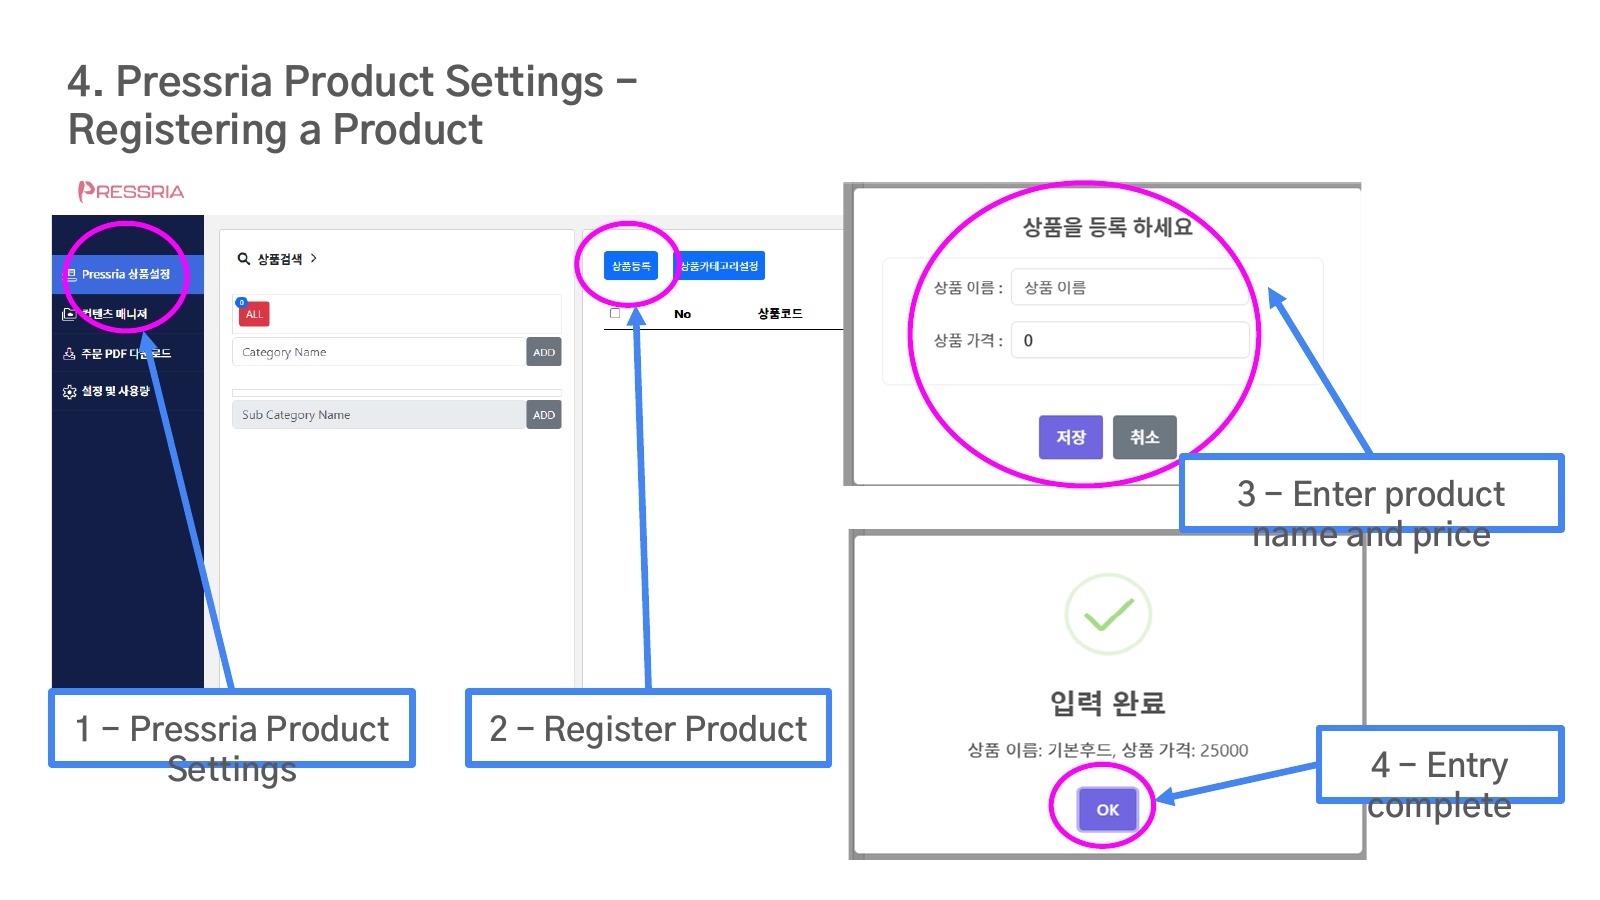
In the left menu under Pressria product settings, click “Register Product”, enter a name and price, then save.
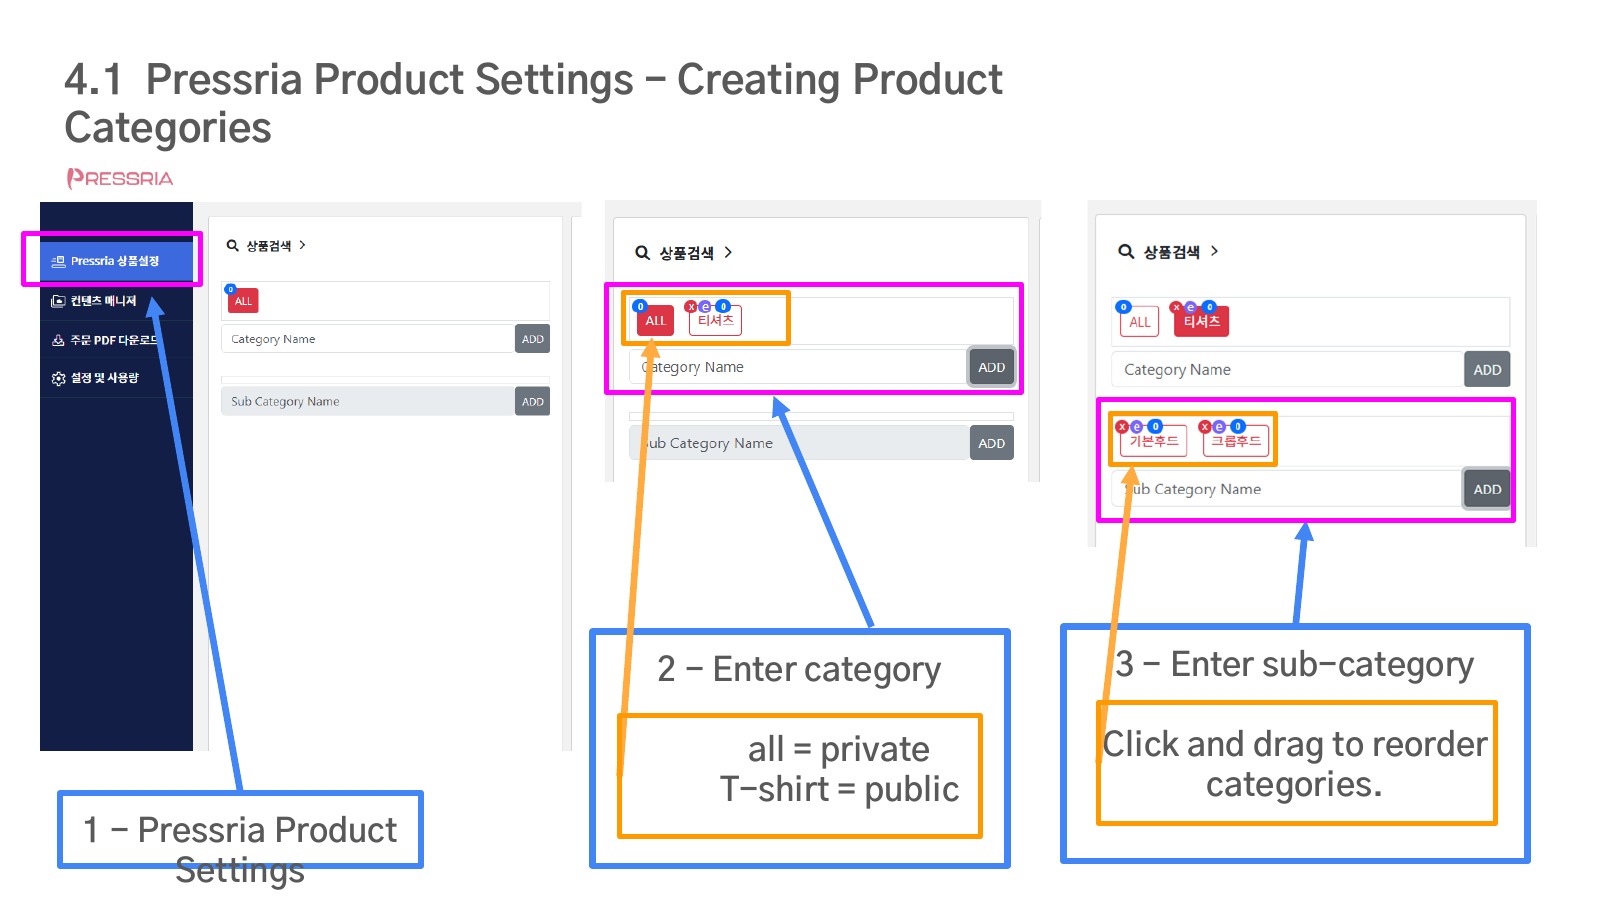
Type a name in Category Name to add a category. “all” is a private, admin-only bucket — any other name becomes a public, customer-facing category. Add sub-categories in Sub Category Name; click-and-drag to reorder them.
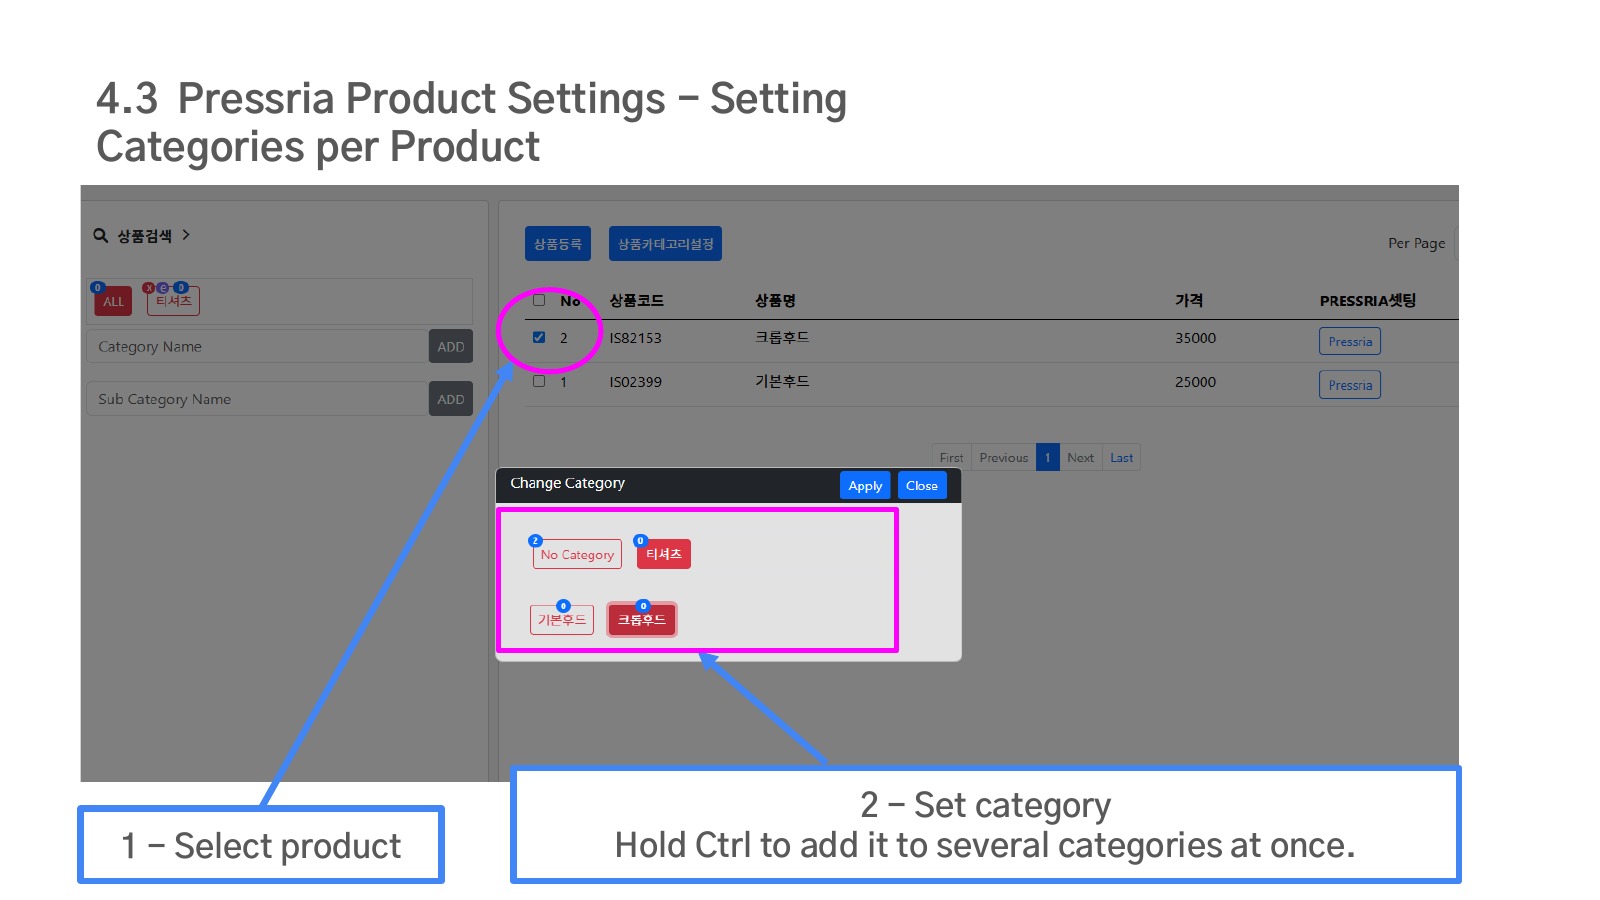
Check a product in the list, click “Change Category”, then pick a category. Hold Ctrl while clicking to place a product into several categories at once.
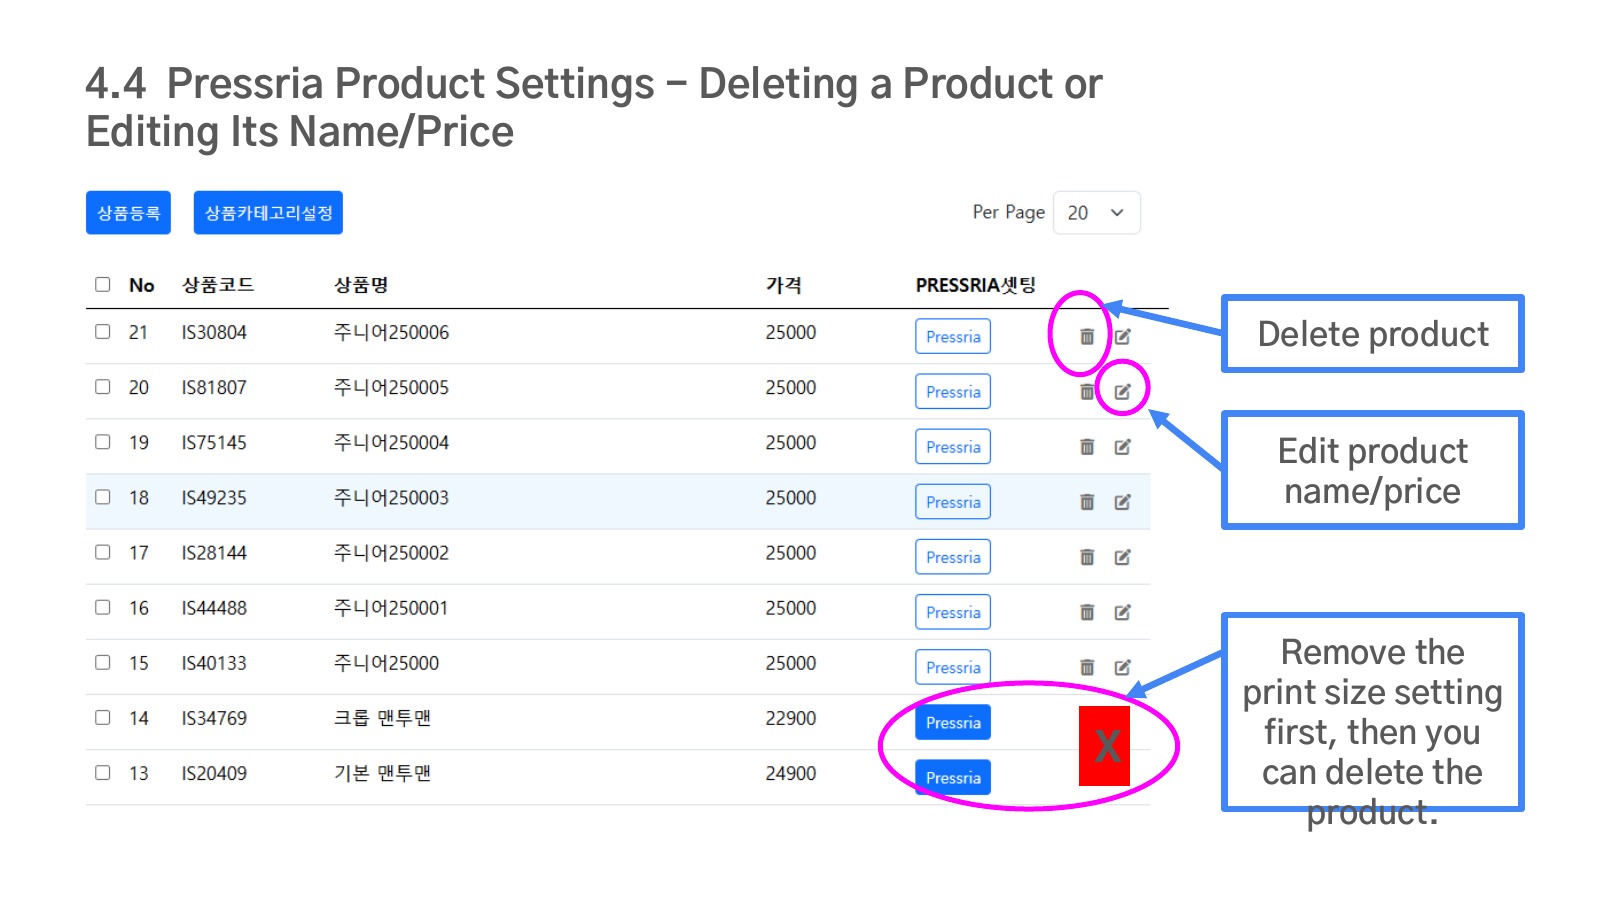
Use the pencil icon on each row to edit the name/price, and the trash icon to delete the product. A product that still has editor settings (print size, etc.) must have that Pressria setup removed before it can be deleted.
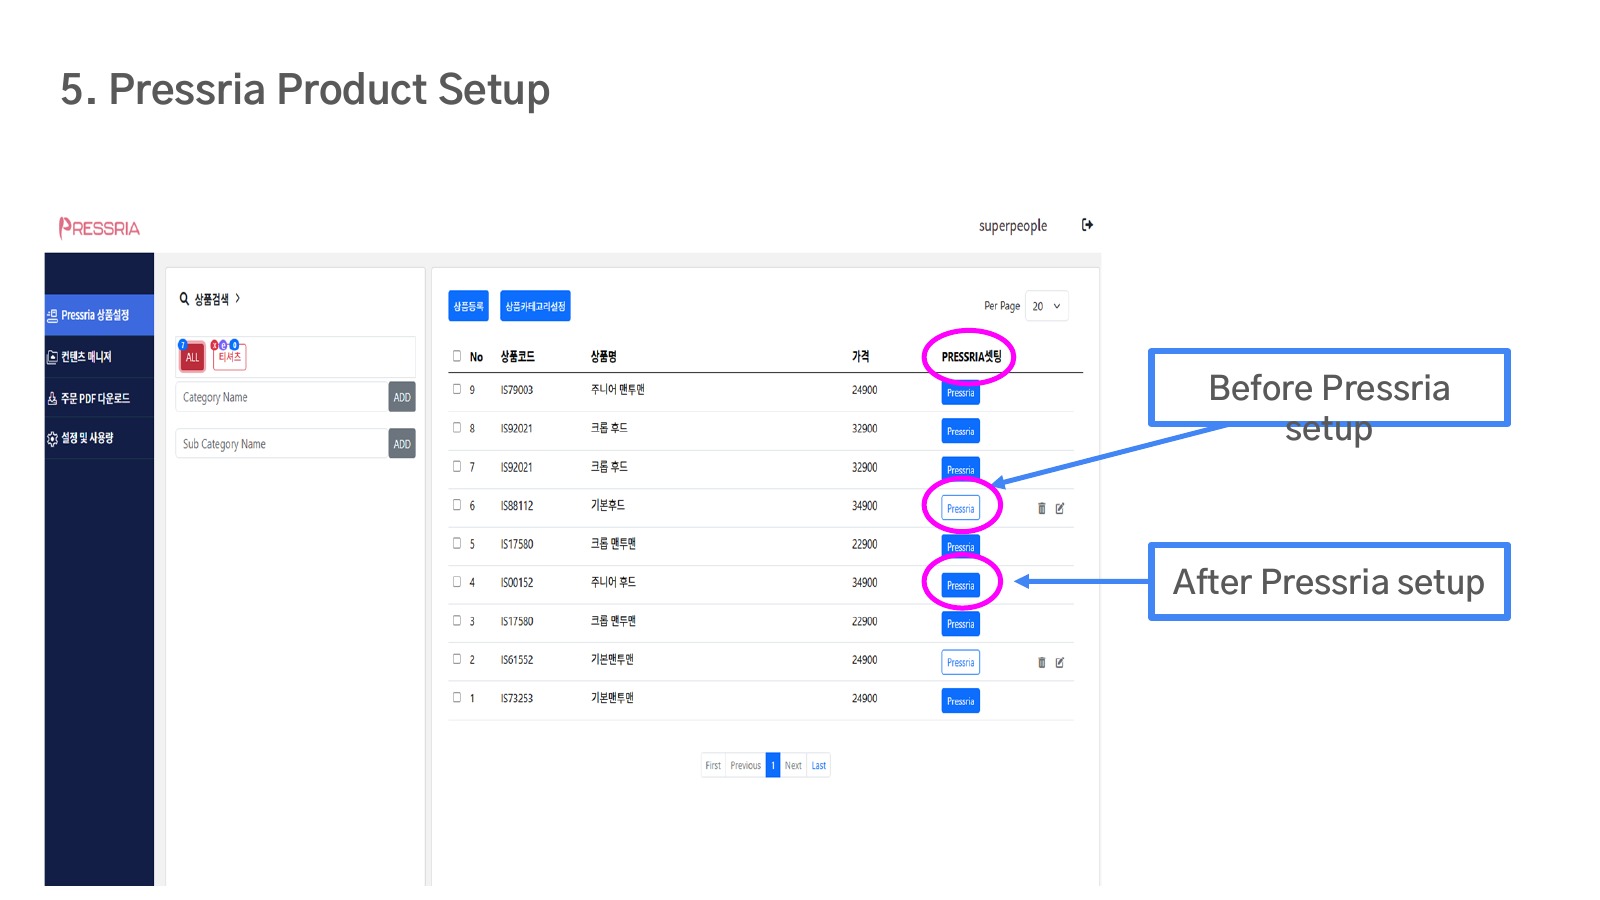
Click the “Pressria” button on a product row to open its editor settings. The button is outlined before setup and becomes solid once setup is complete.
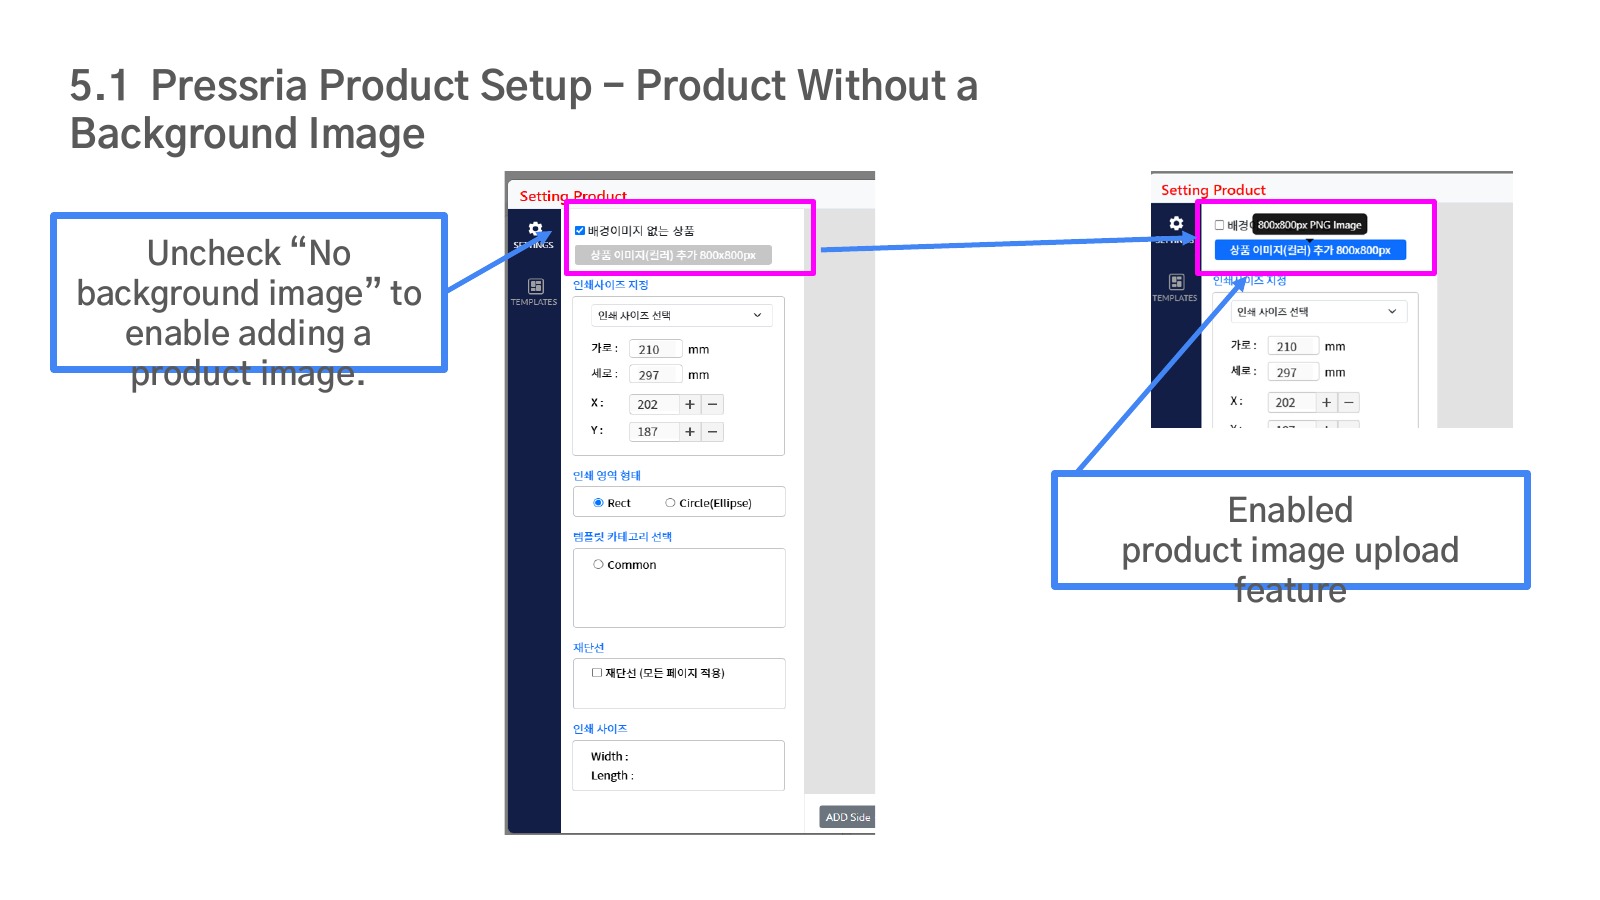
Uncheck “No background image” to enable the area for uploading a product image.
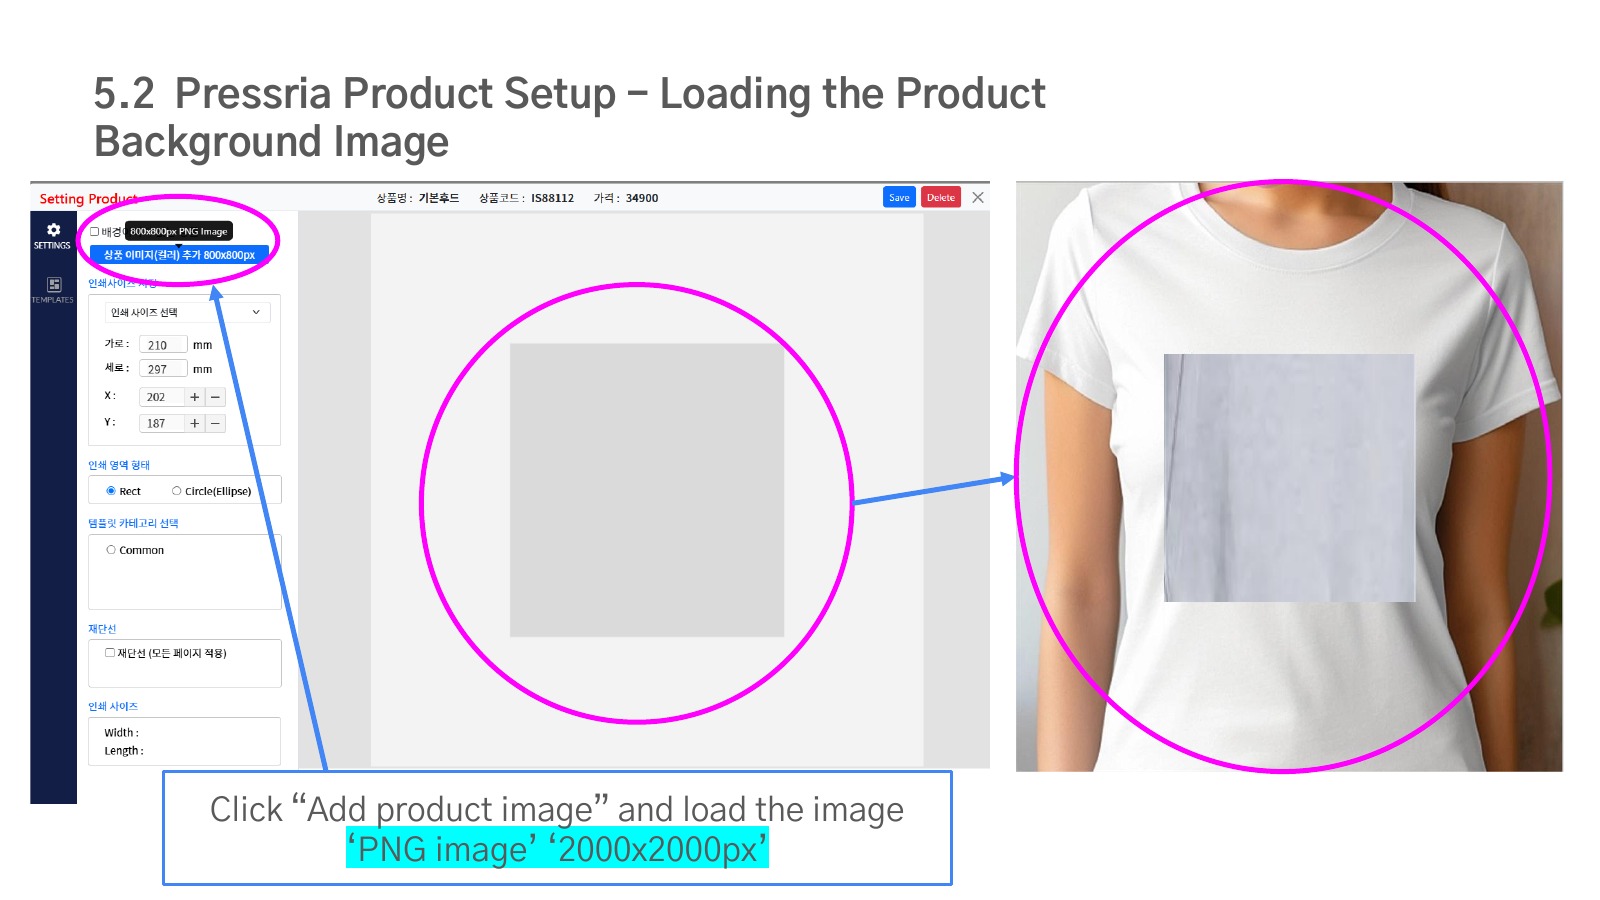
Upload a 2000×2000px PNG image. This becomes the background that makes the editor look like an actual product photo.
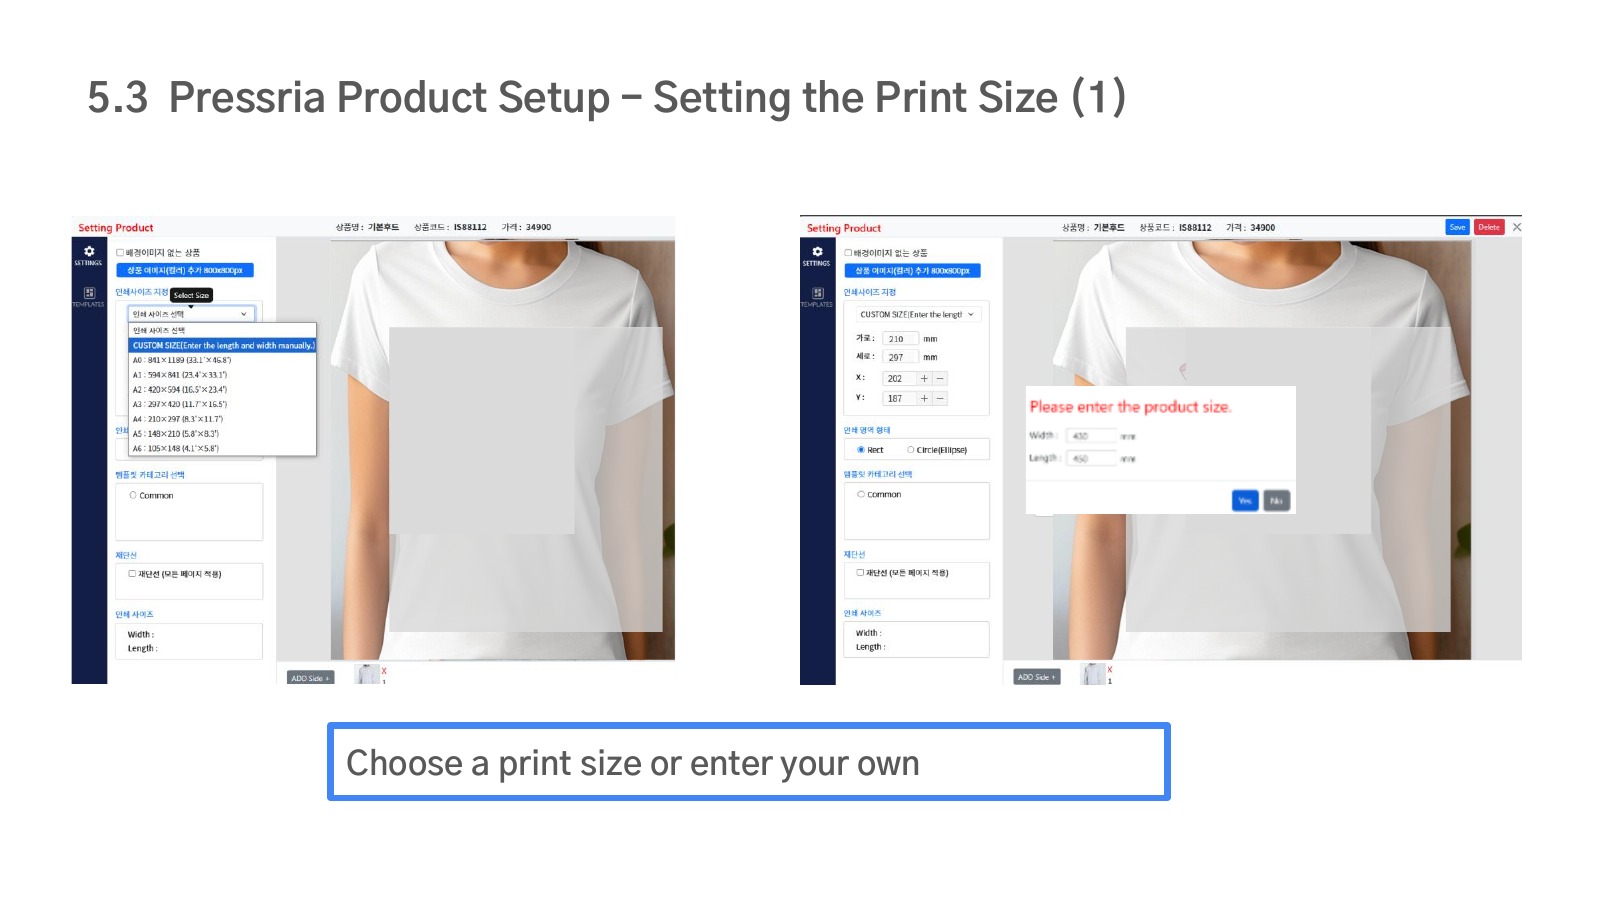
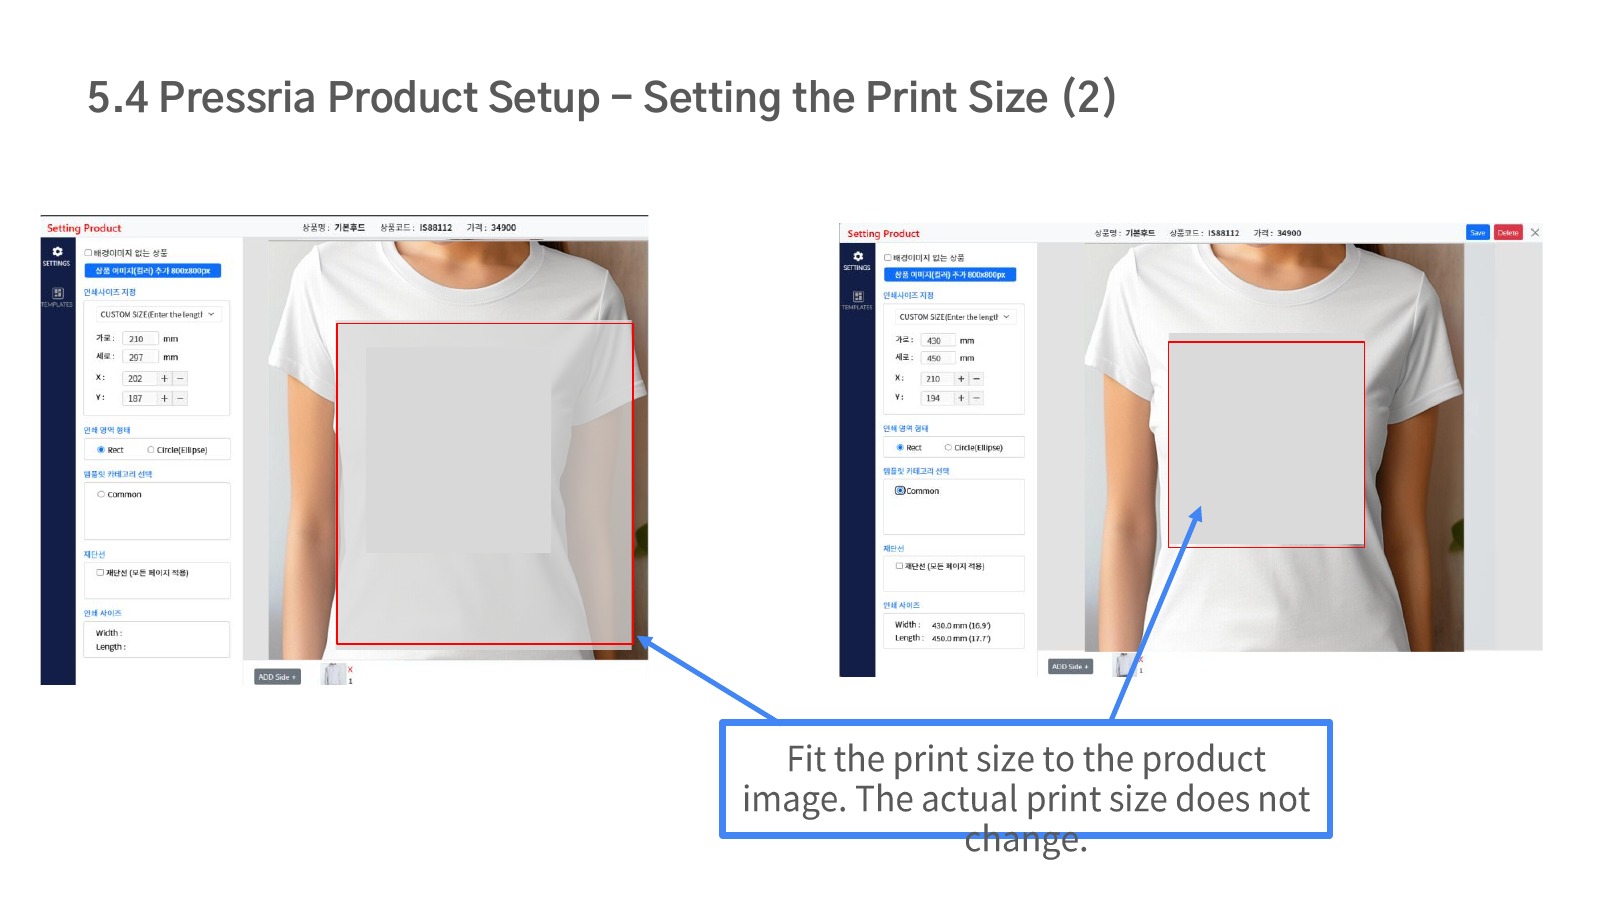
Pick a standard size from the print-size dropdown, or choose Custom Size to enter the width and height yourself.
Drag the print area (red outline) onto the exact print position on the product photo. This only changes where it sits on screen — the real print size in mm stays the same.
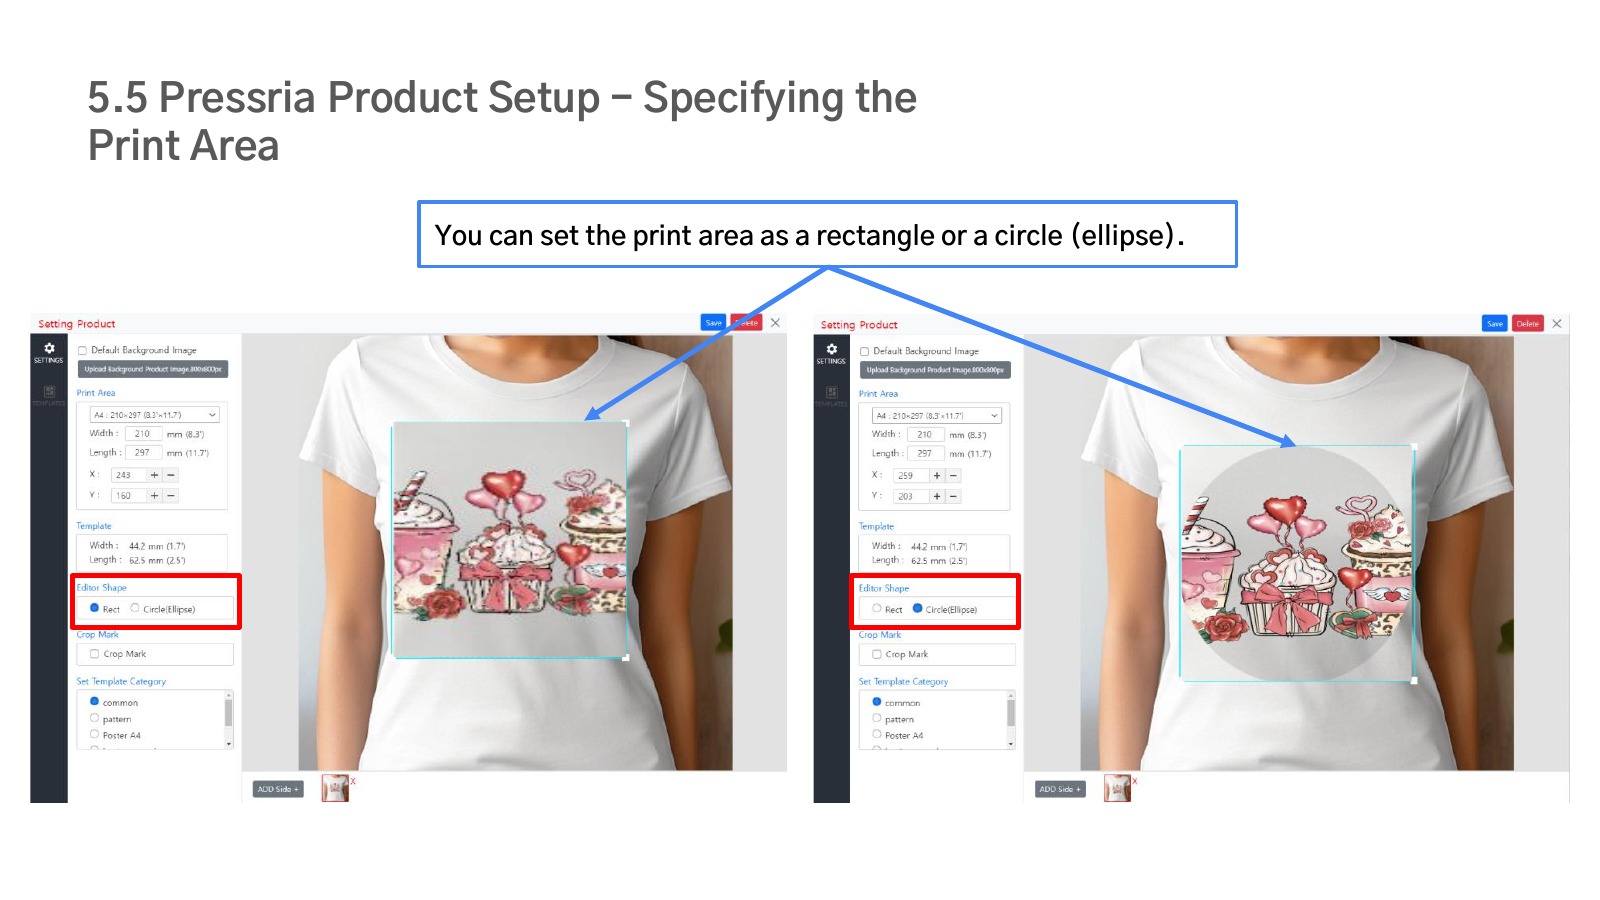
Under Editor Shape, choose either Rect or Circle(Ellipse) to define the shape of the printable area.
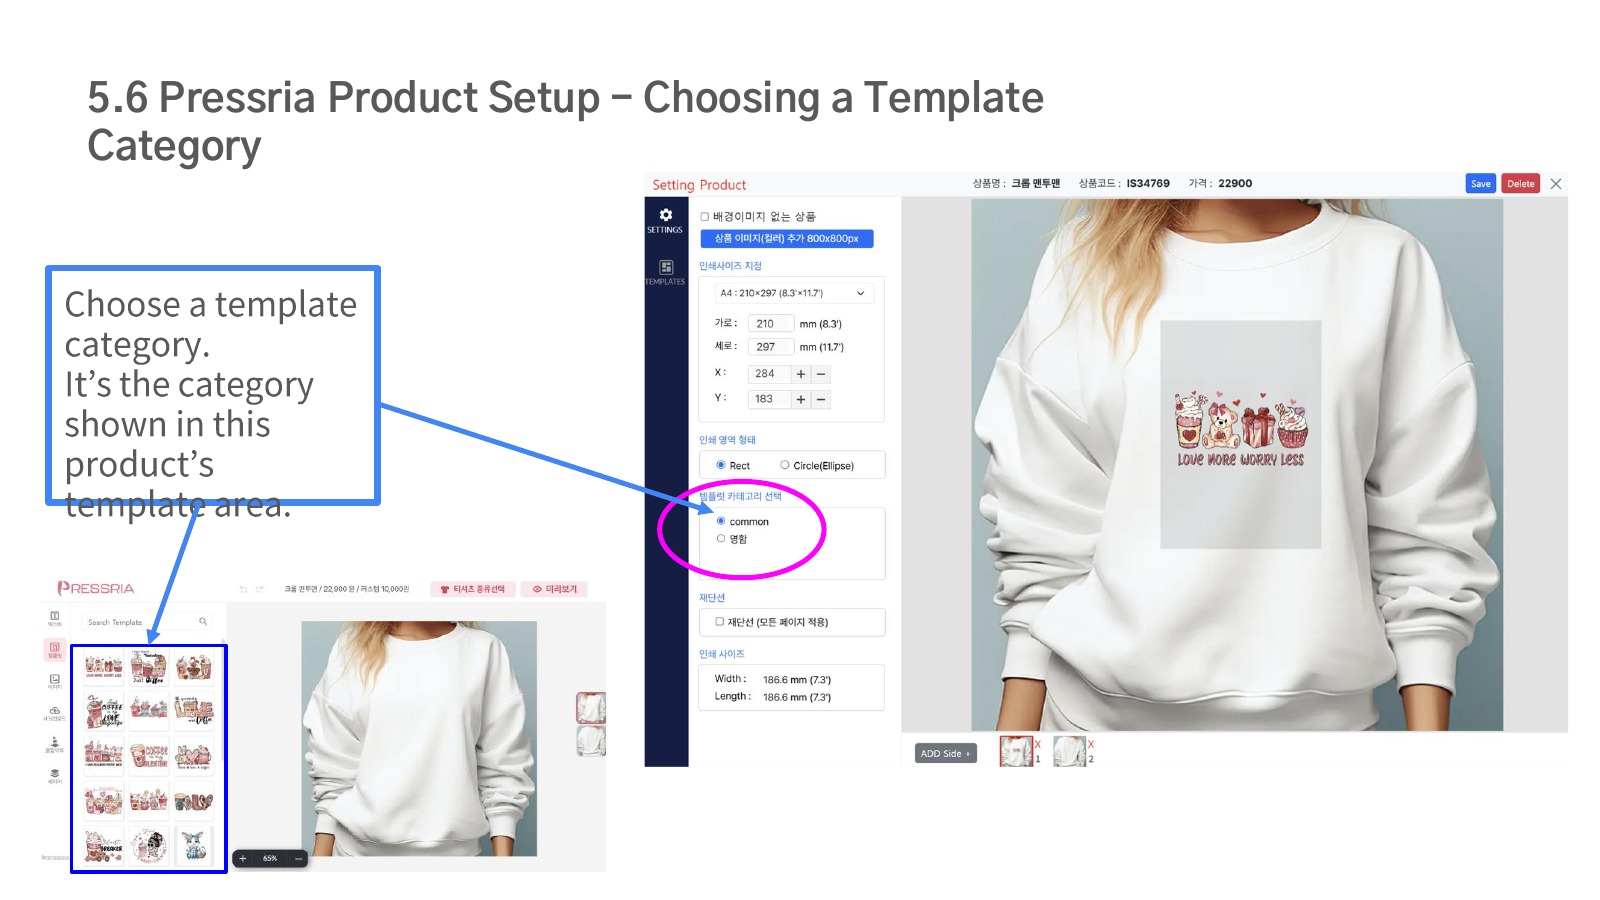
Pick which template category this product’s editor should show. Customers browsing templates in the editor will only see templates from the selected category.
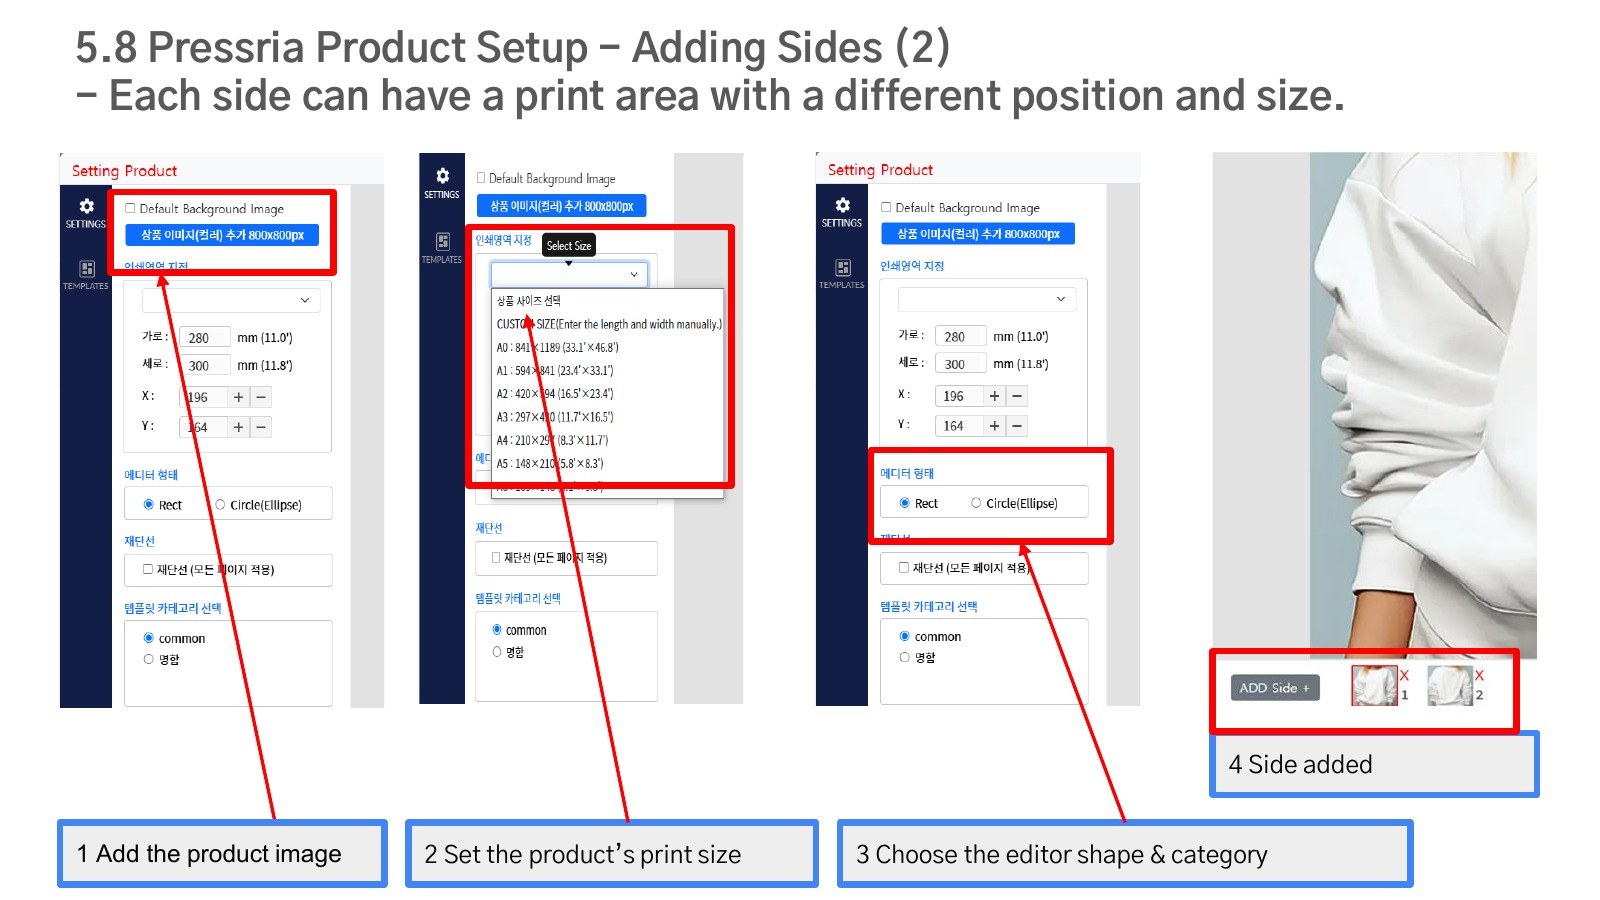
Use the ADD Side button to add up to 5 print sides (front, back, etc.). Added sides show up as thumbnails at the bottom.
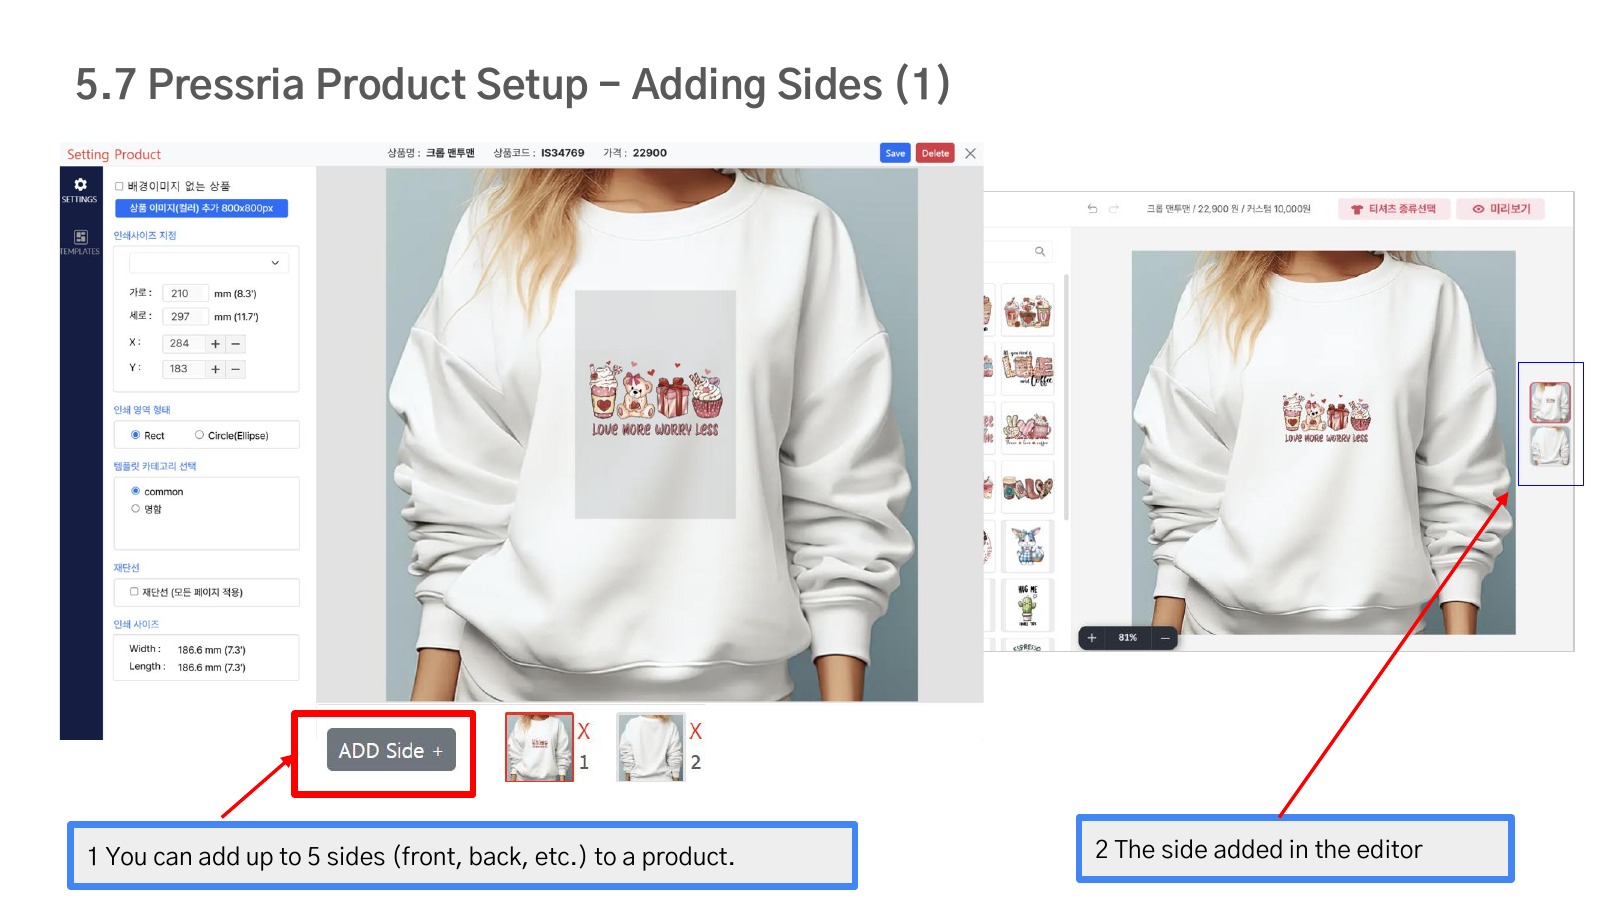
Each added side can have its own product image, print size, print-area shape, and template category.
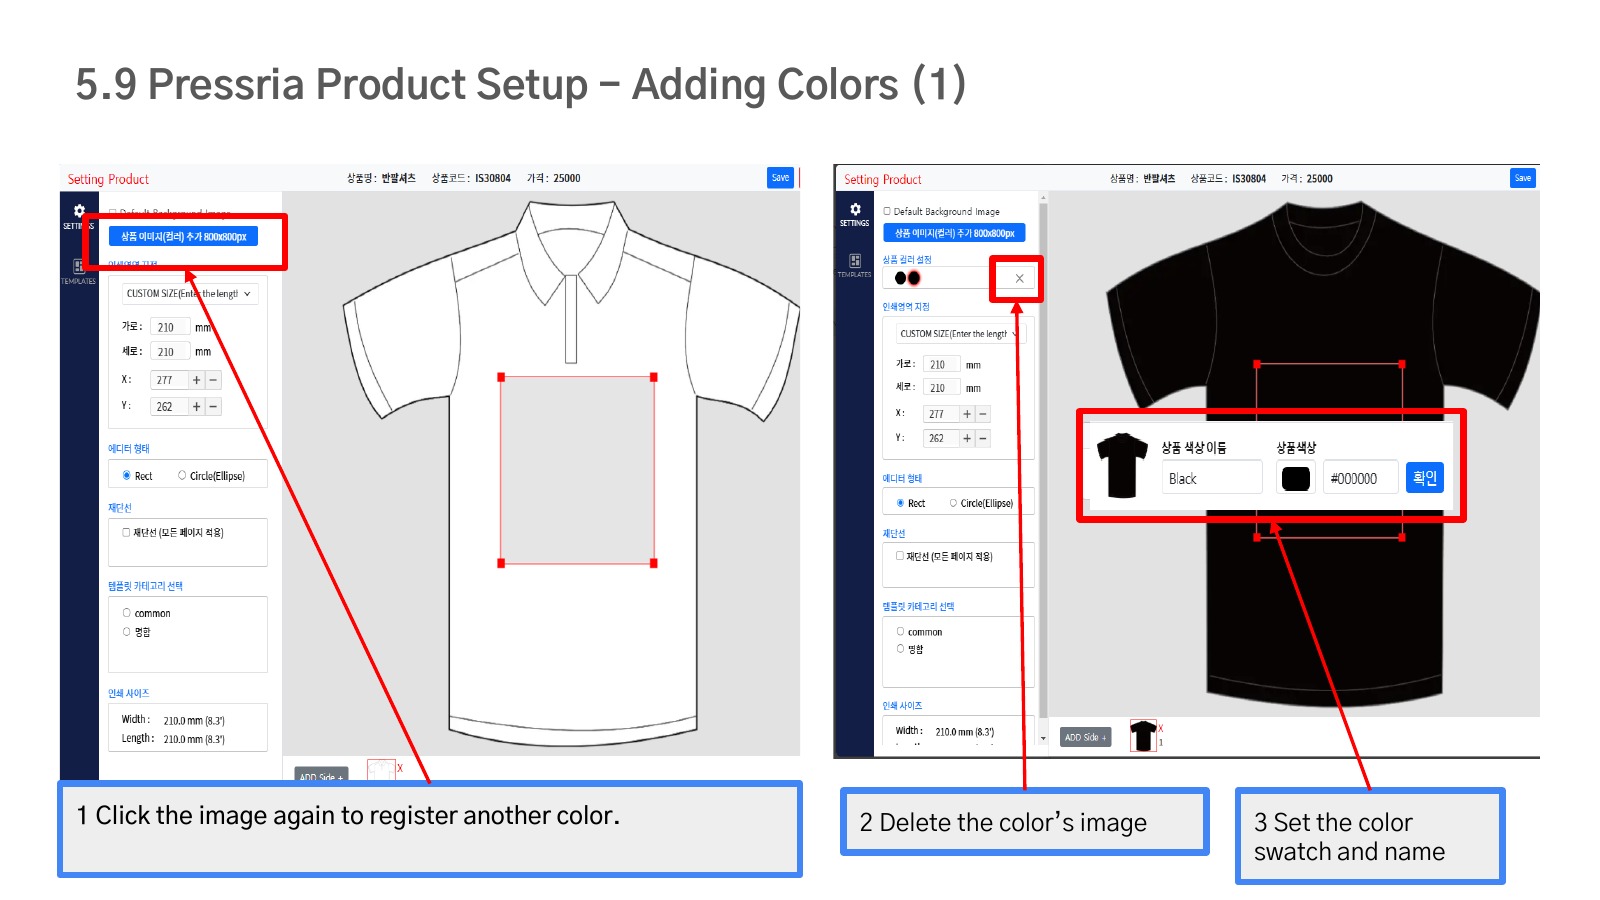
Adding a product image again creates a new color option. Enter the color swatch and color name to save it, or remove it with the X icon.
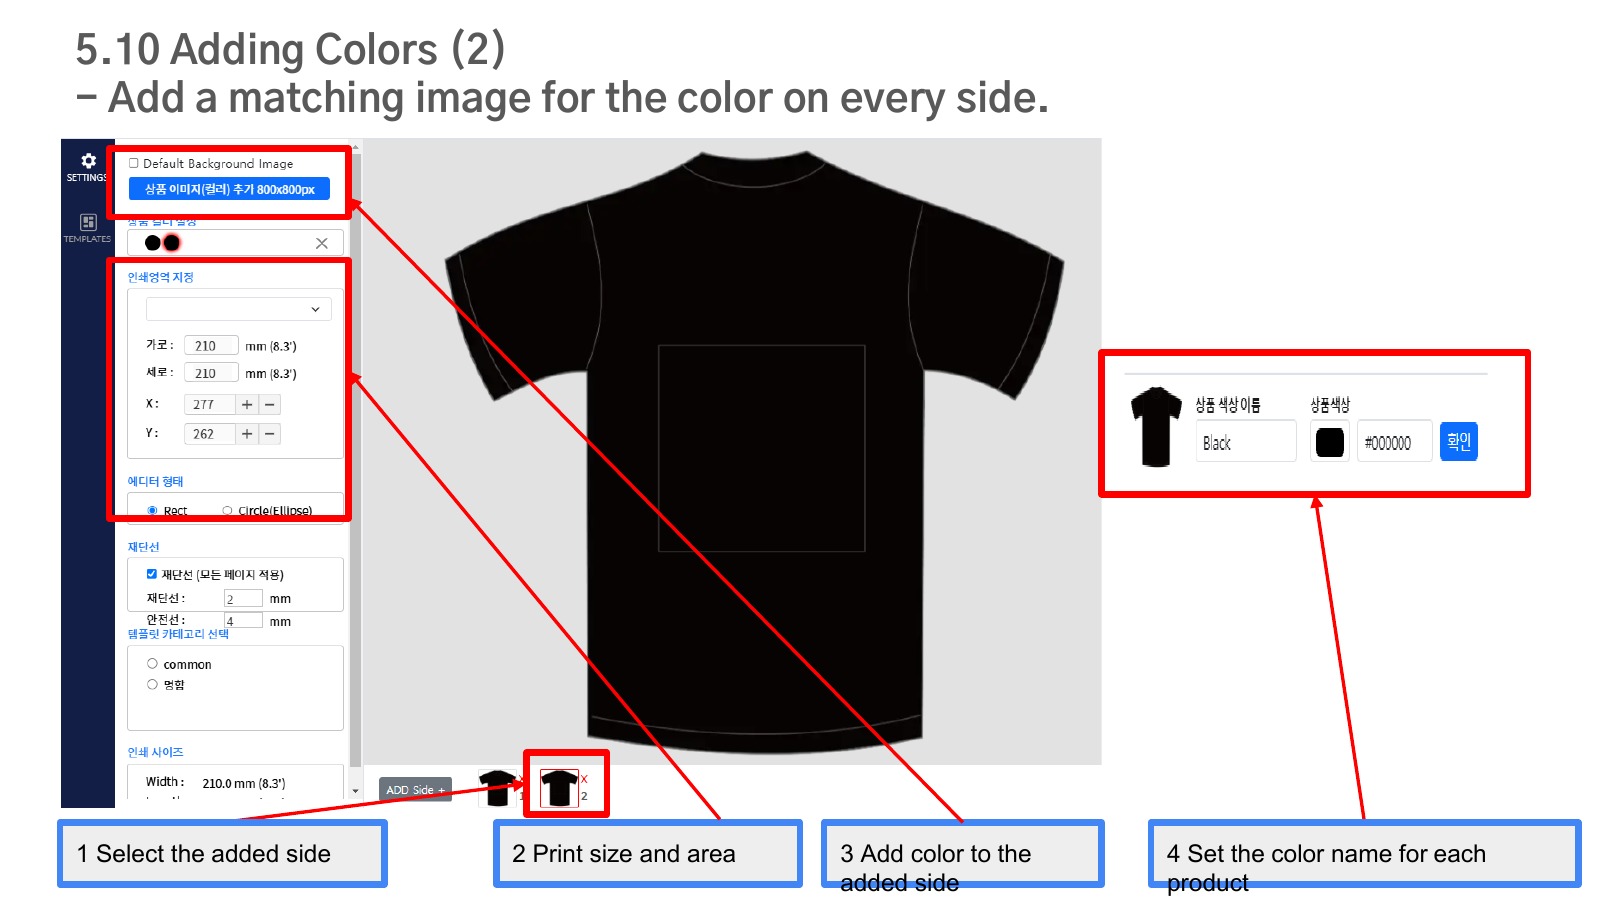
Every added color needs its own image registered on each side. Select a side first, then set that side’s print area and the product image for each color.
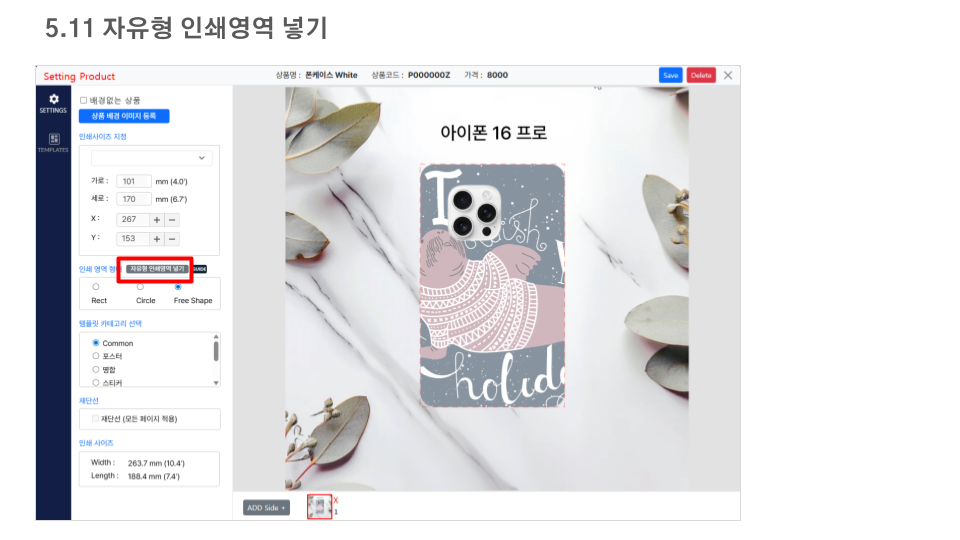
When a print area needs a shape other than a rectangle or circle, choose Free Shape under Editor Shape and upload an SVG file via the “Add free-form print area” button.
In Illustrator, draw a path the same size as the actual print area and save it as an SVG.
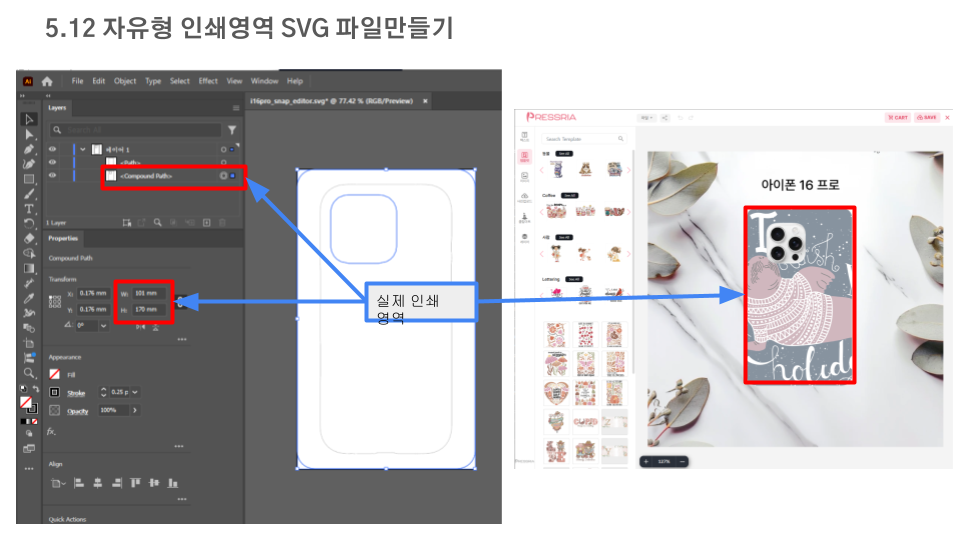
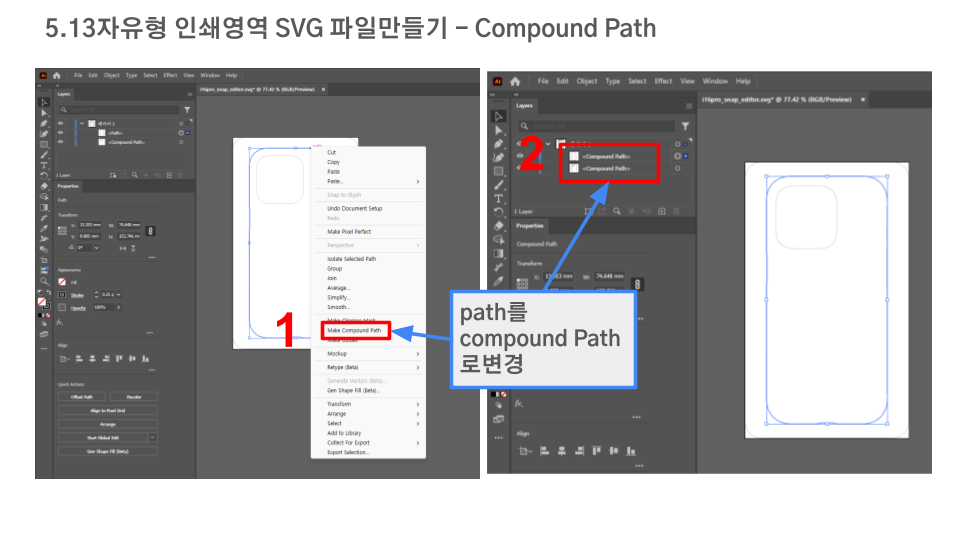
Select the path, right-click, and choose Make Compound Path.
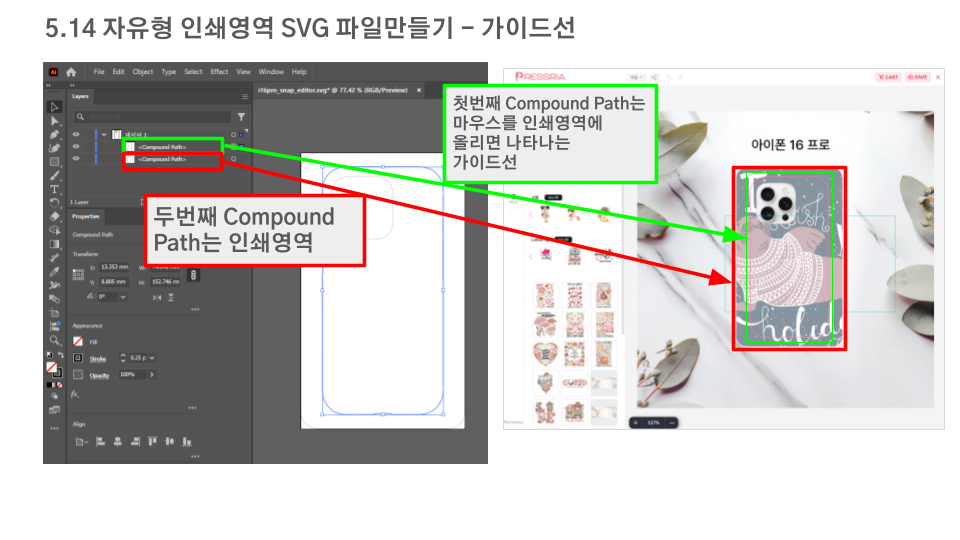
If the layer has two Compound Paths, the first is treated as the hover guide line and the second as the actual print area.
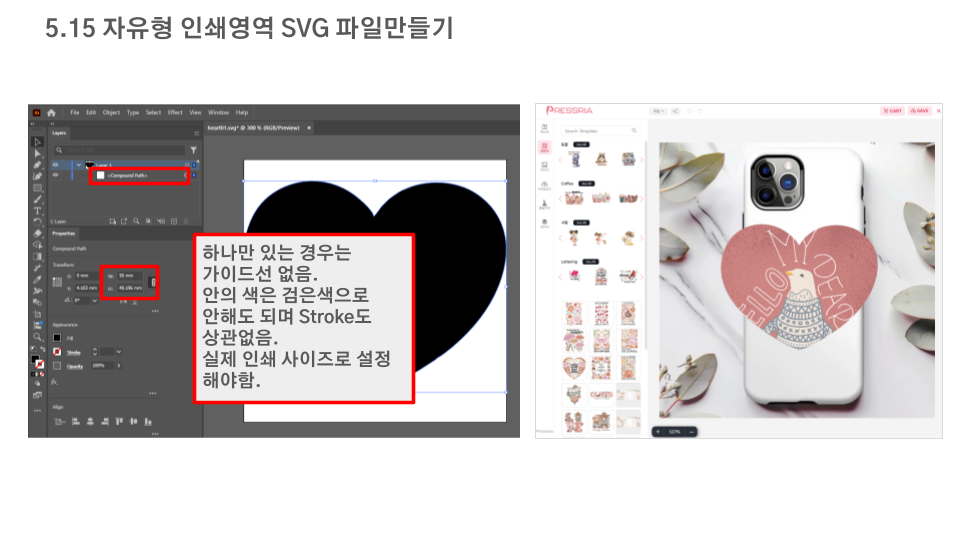
With only one Compound Path, that path itself becomes the print area (no separate guide line). Fill color and stroke don’t matter — just draw it at the real print size.
Download a sample free-form print-area SVG file to use as a reference.

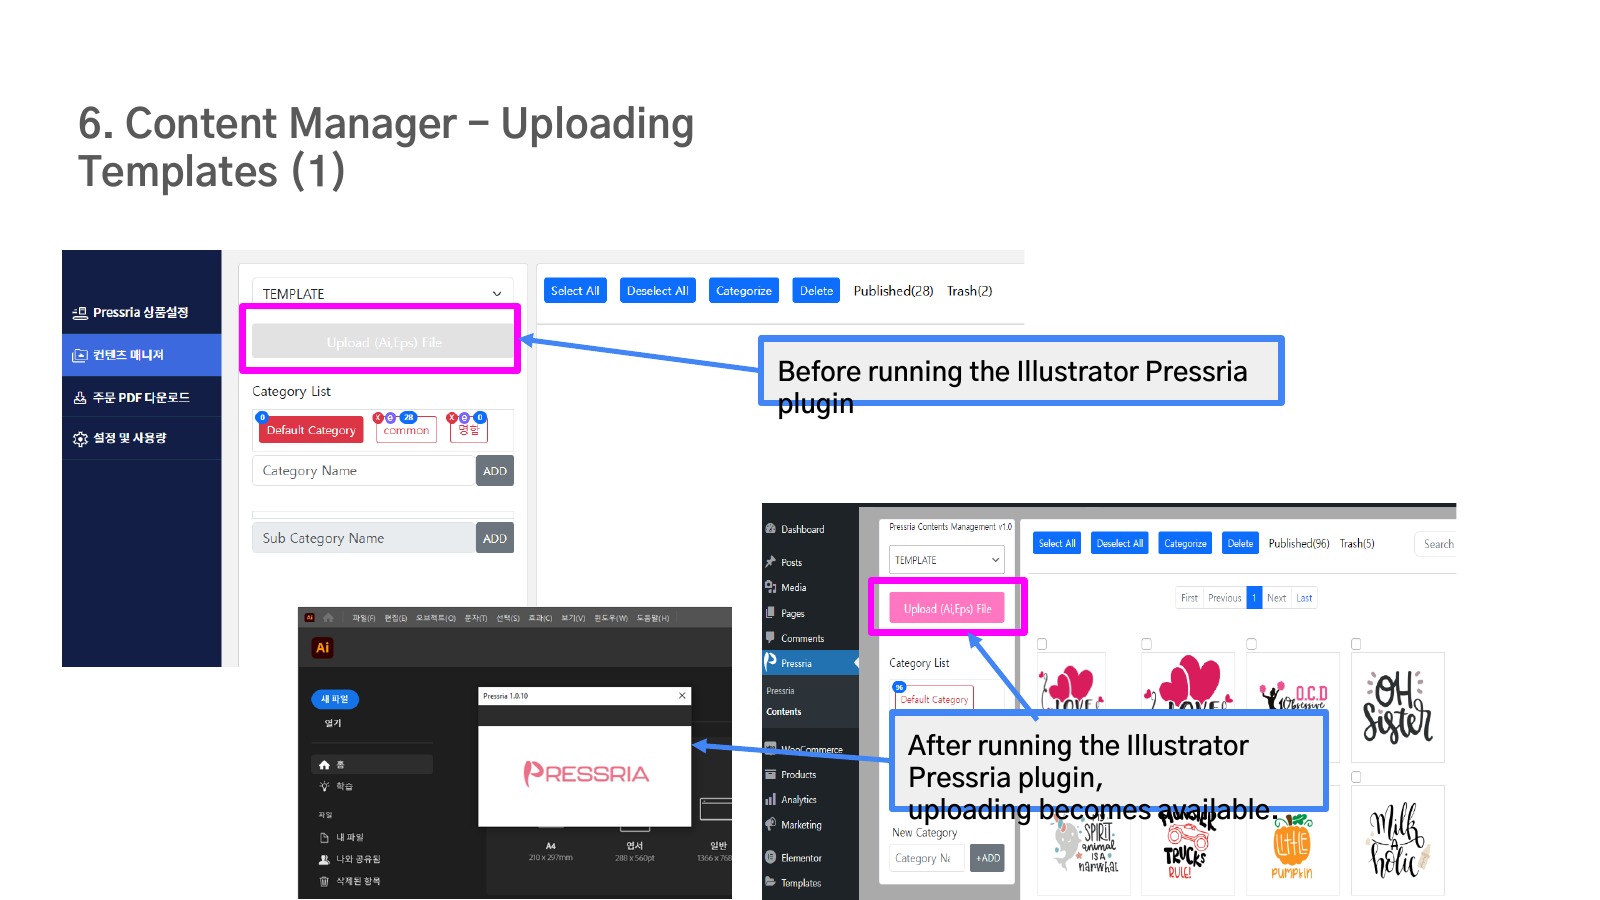
The Upload (Ai, Eps) File button is only enabled while the Pressria plugin is running in Illustrator.
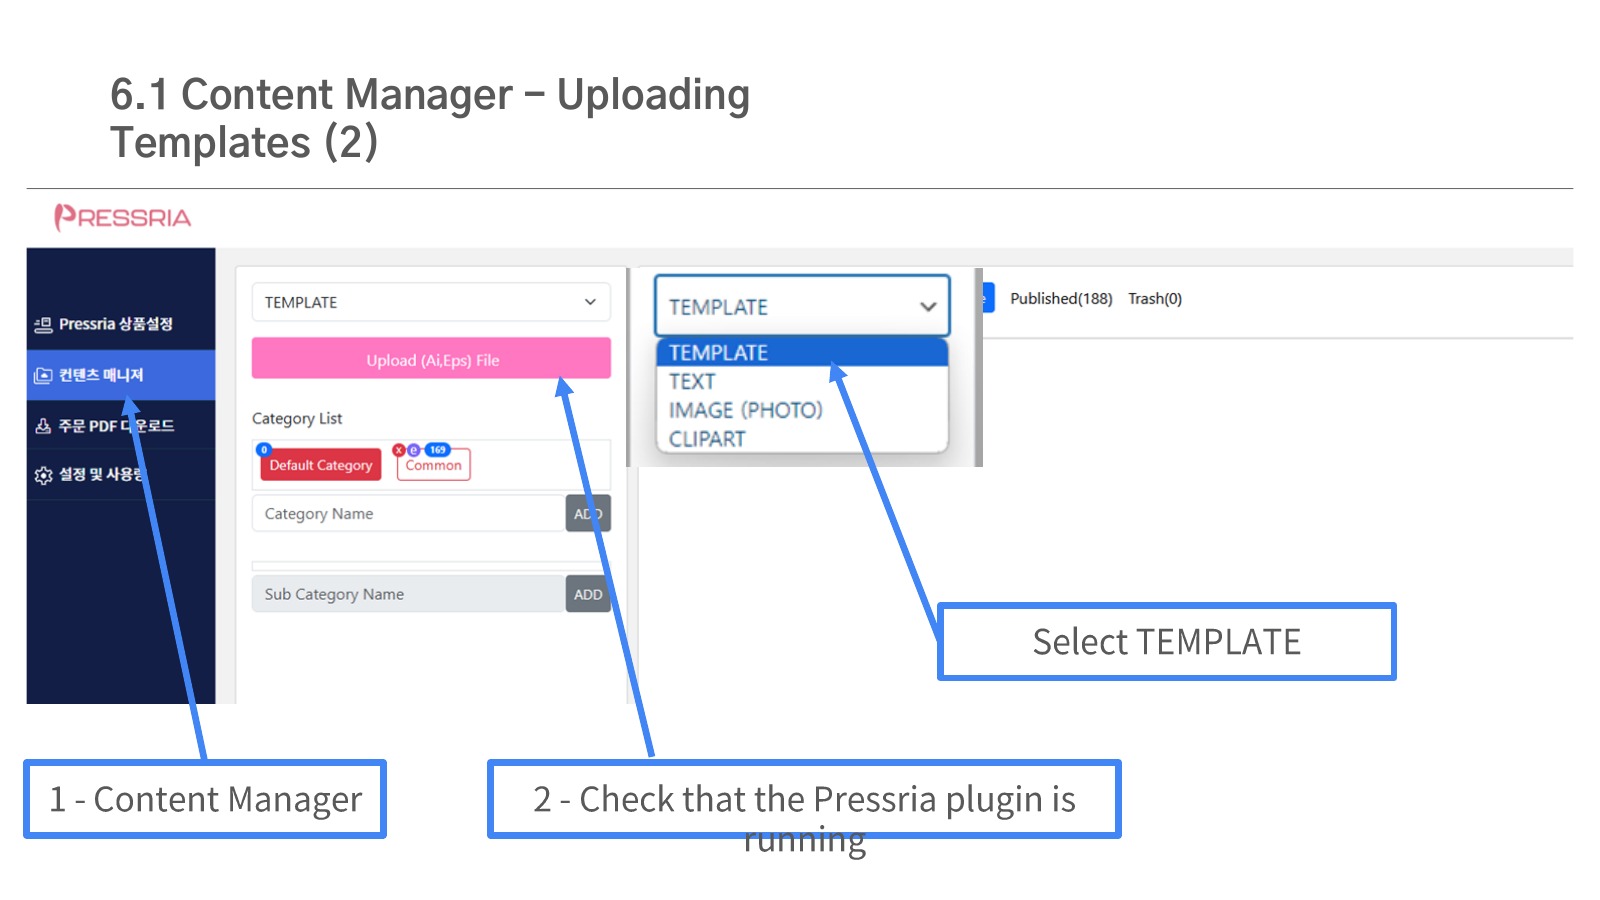
Choose TEMPLATE in the dropdown at the top of Content Manager, then upload your file. The same dropdown also switches to TEXT, IMAGE (PHOTO), and CLIPART.
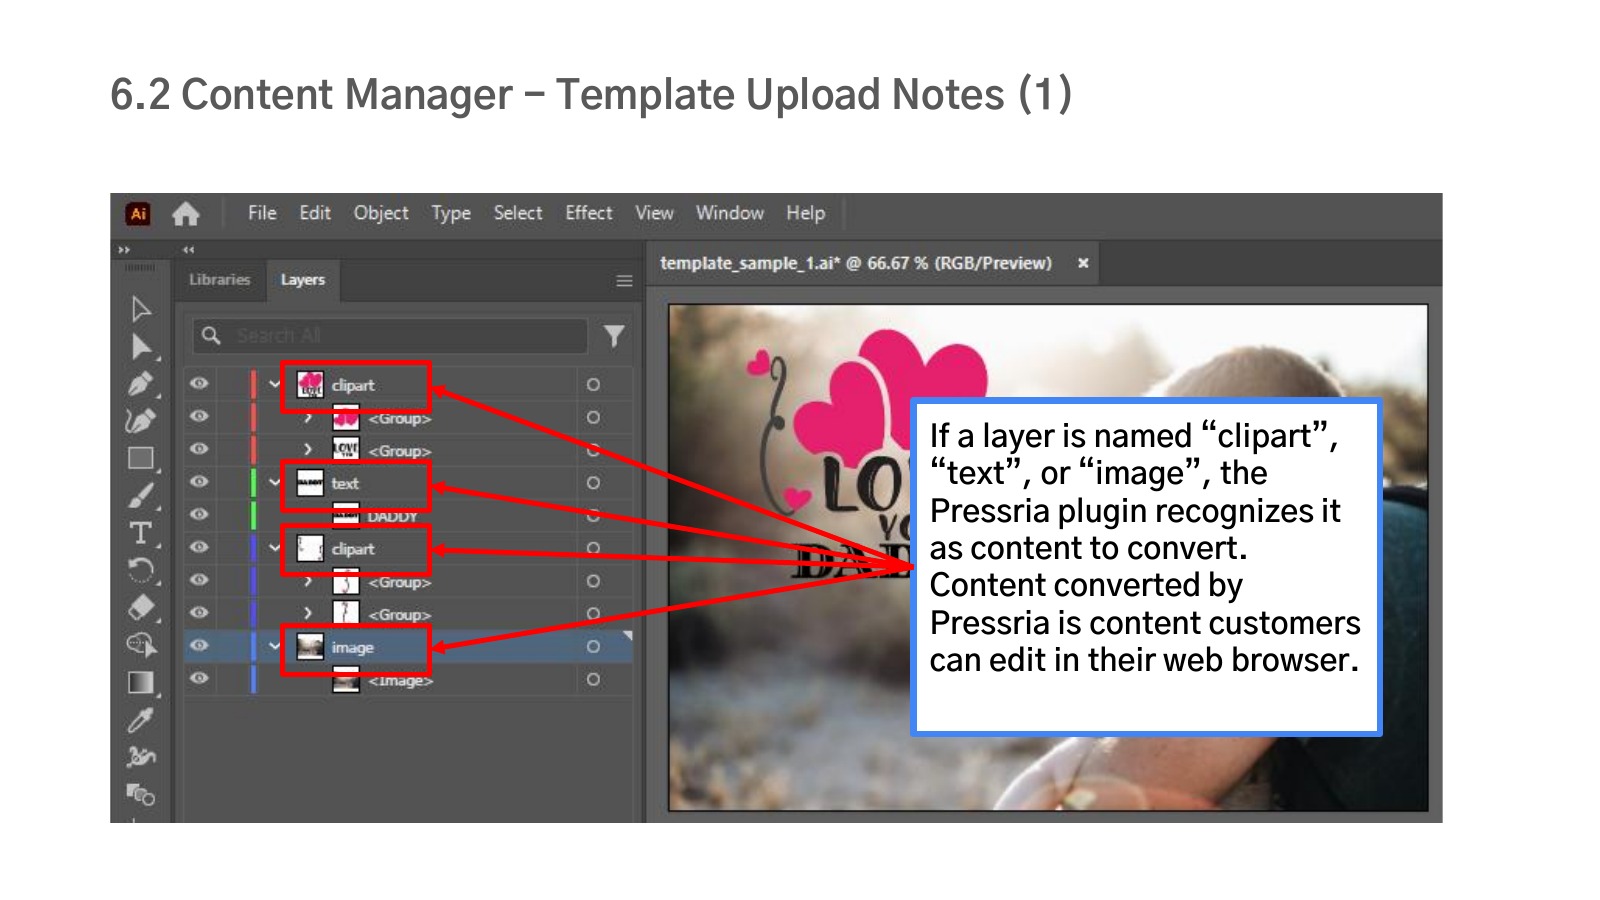
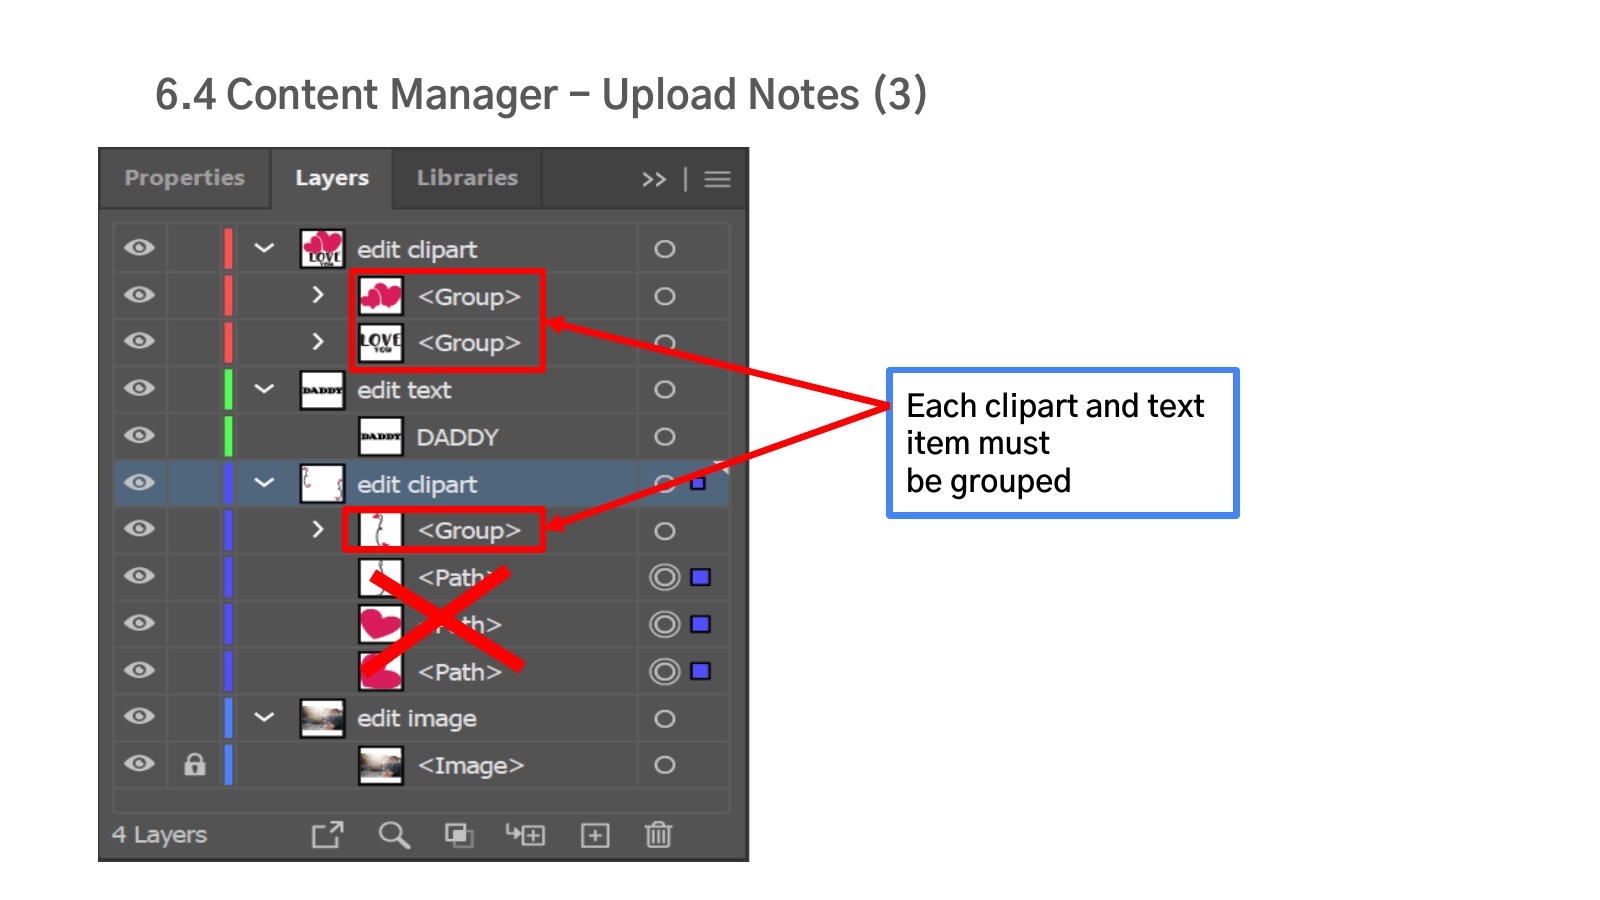
When a layer is named clipart, text, or image, Pressria recognizes it as editable content and converts it into something customers can edit in the web editor.
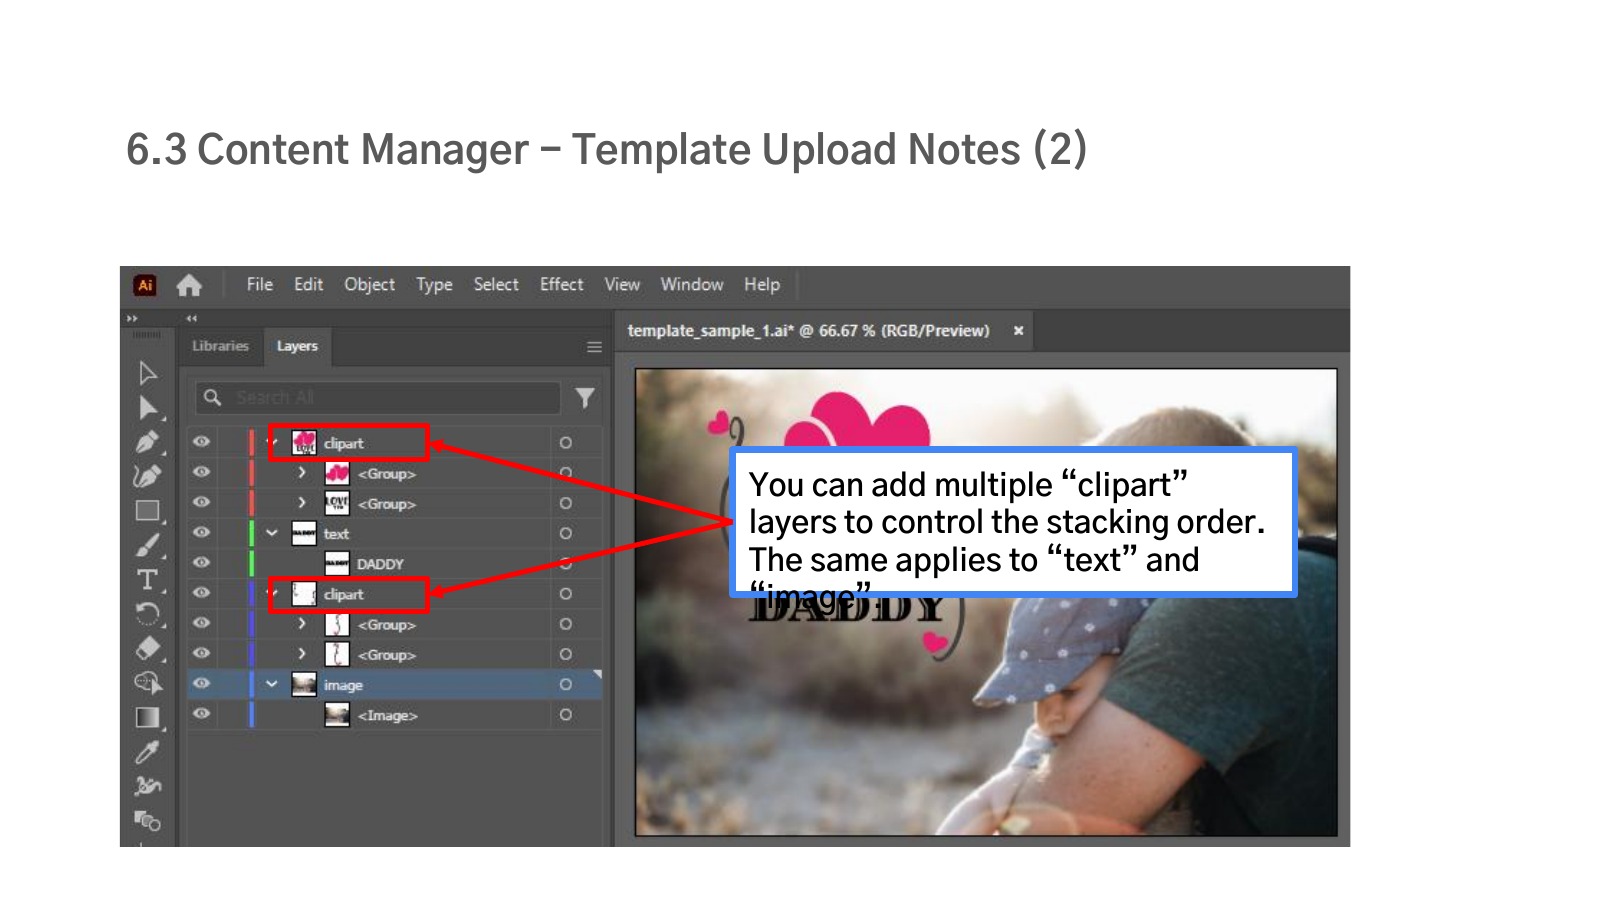
You can add several clipart, text, or image layers to control their stacking order.
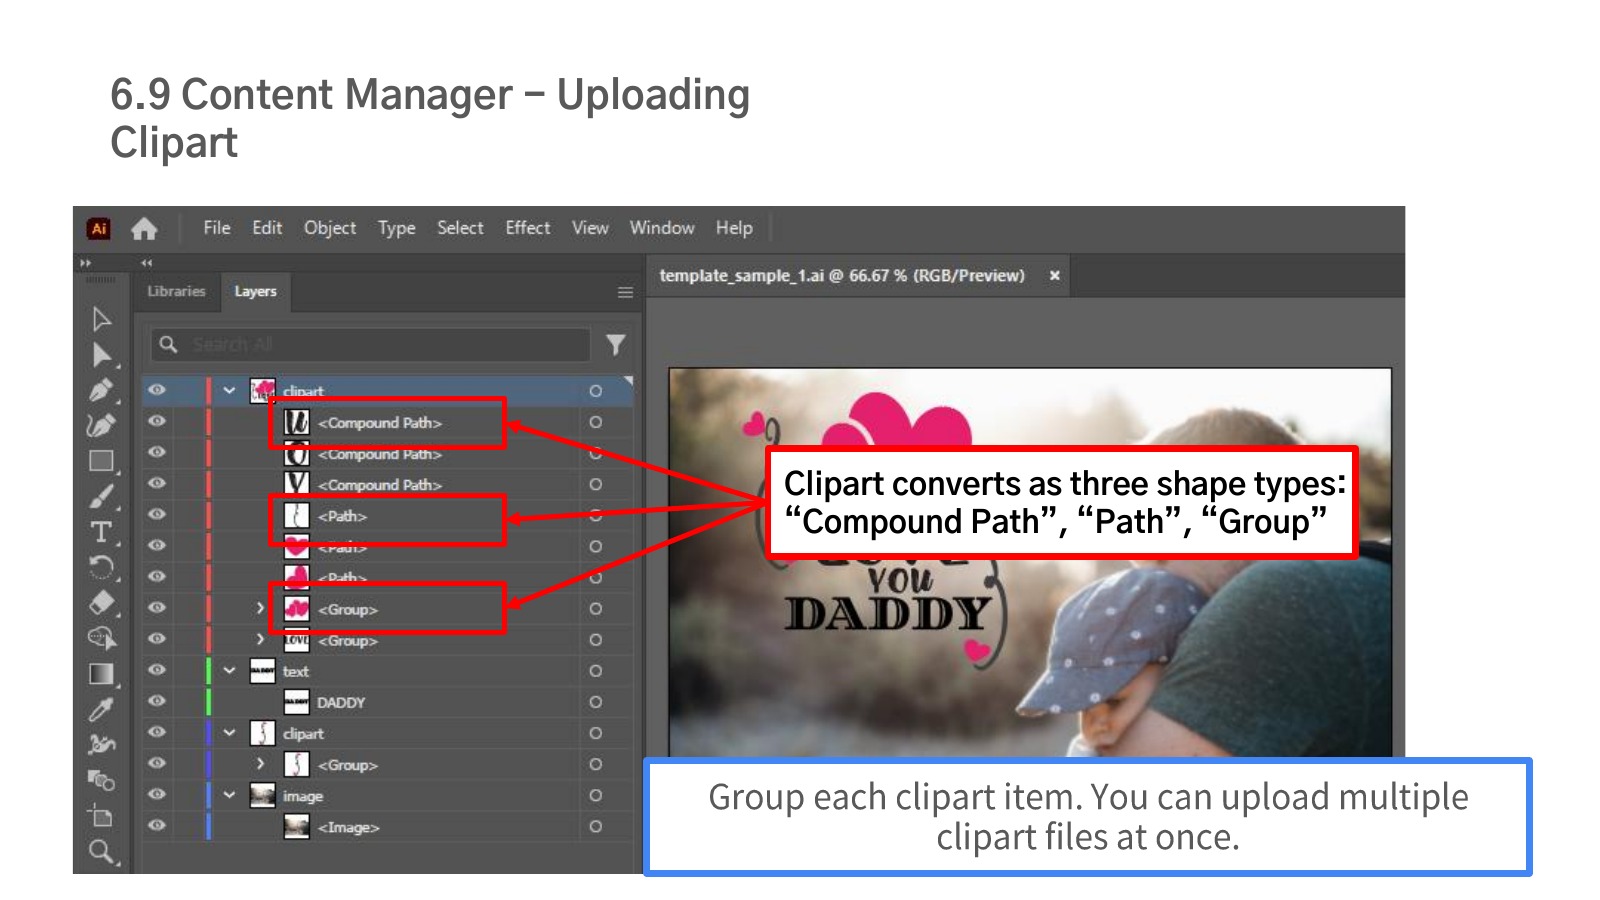
Each clipart and text item must be grouped so it is recognized as a single editable object.
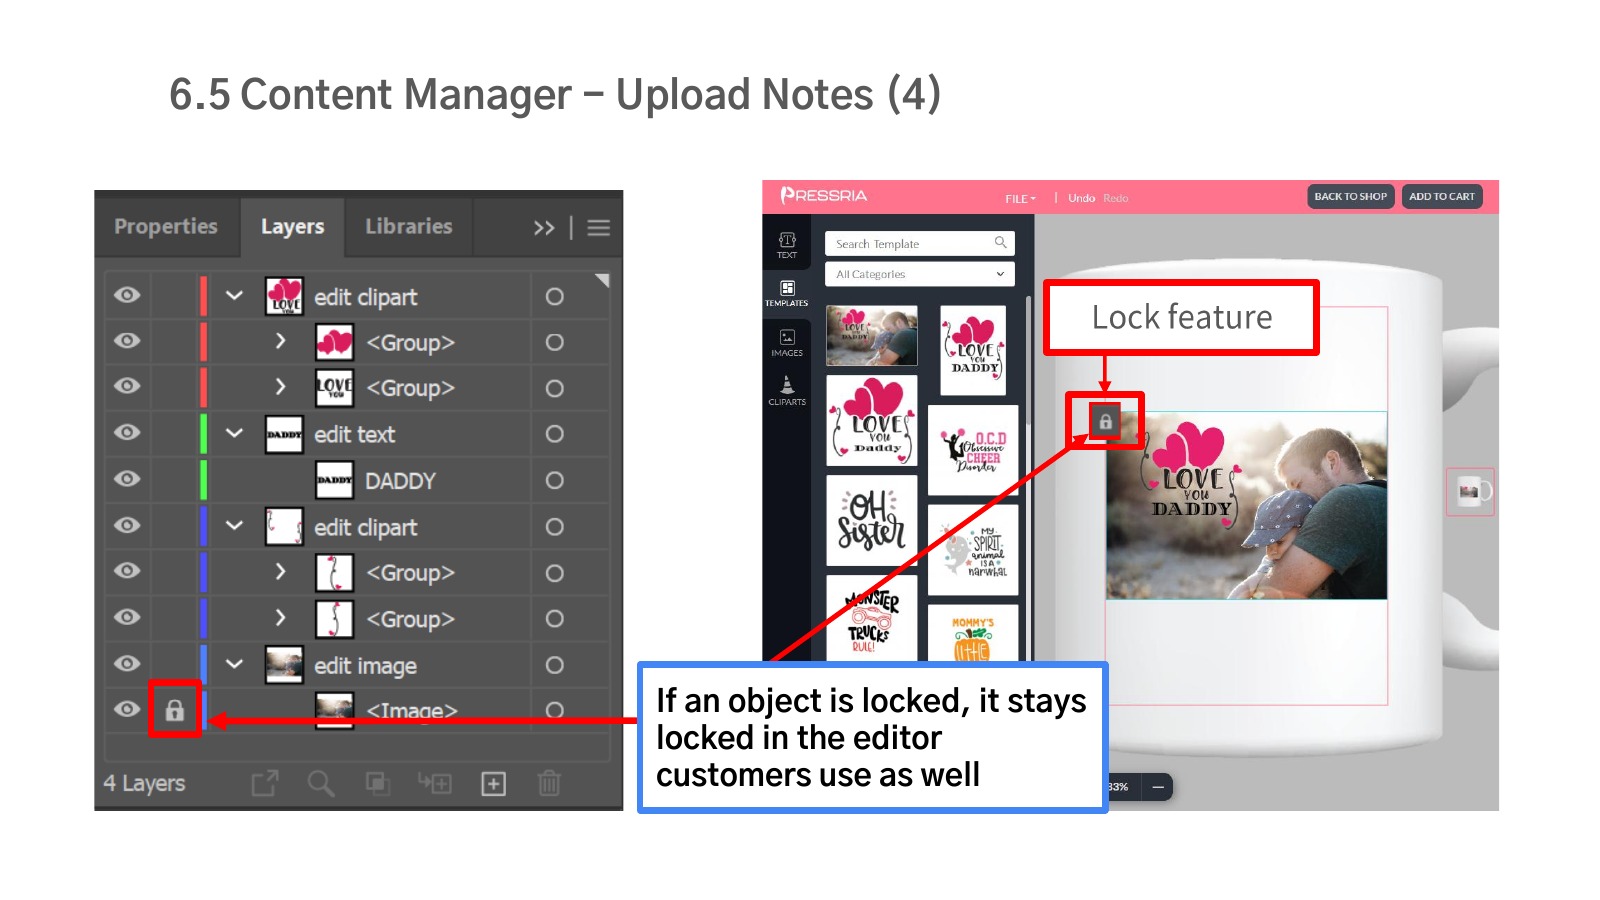
Locking an object in the Layers panel keeps it locked in the customer-facing web editor too, so it can’t be modified.
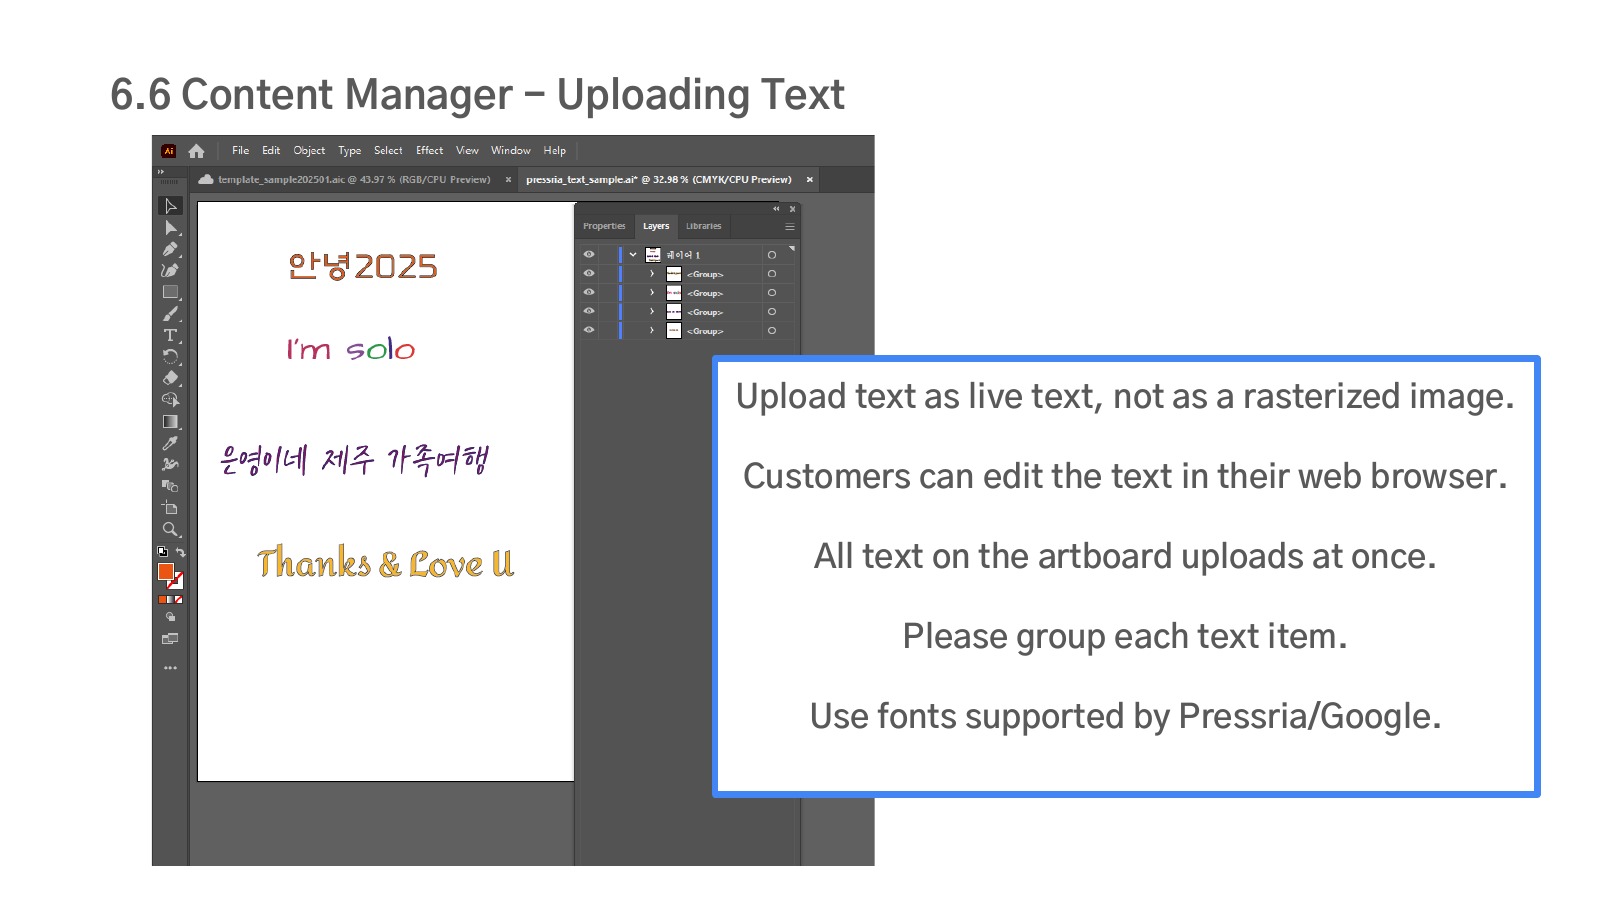
Upload text as live text, not a rasterized image, so customers can edit it in the browser. Multiple text items on one artboard upload together — group each one, and use fonts available through Pressria/Google Fonts.
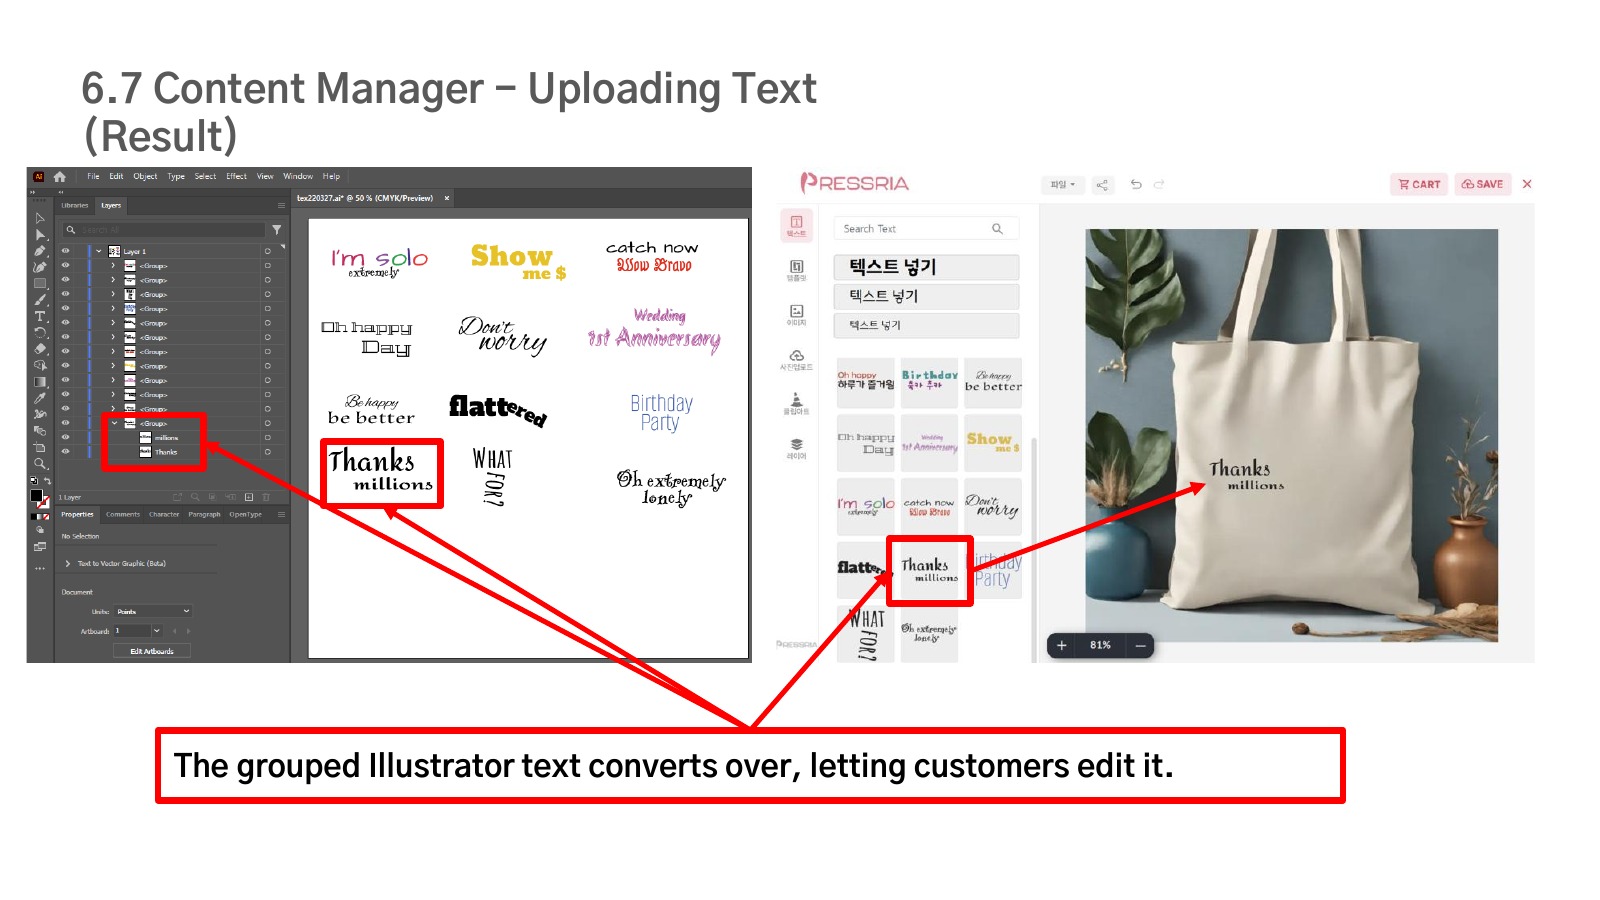
The grouped Illustrator text carries straight over, letting customers freely edit the wording in the web editor.
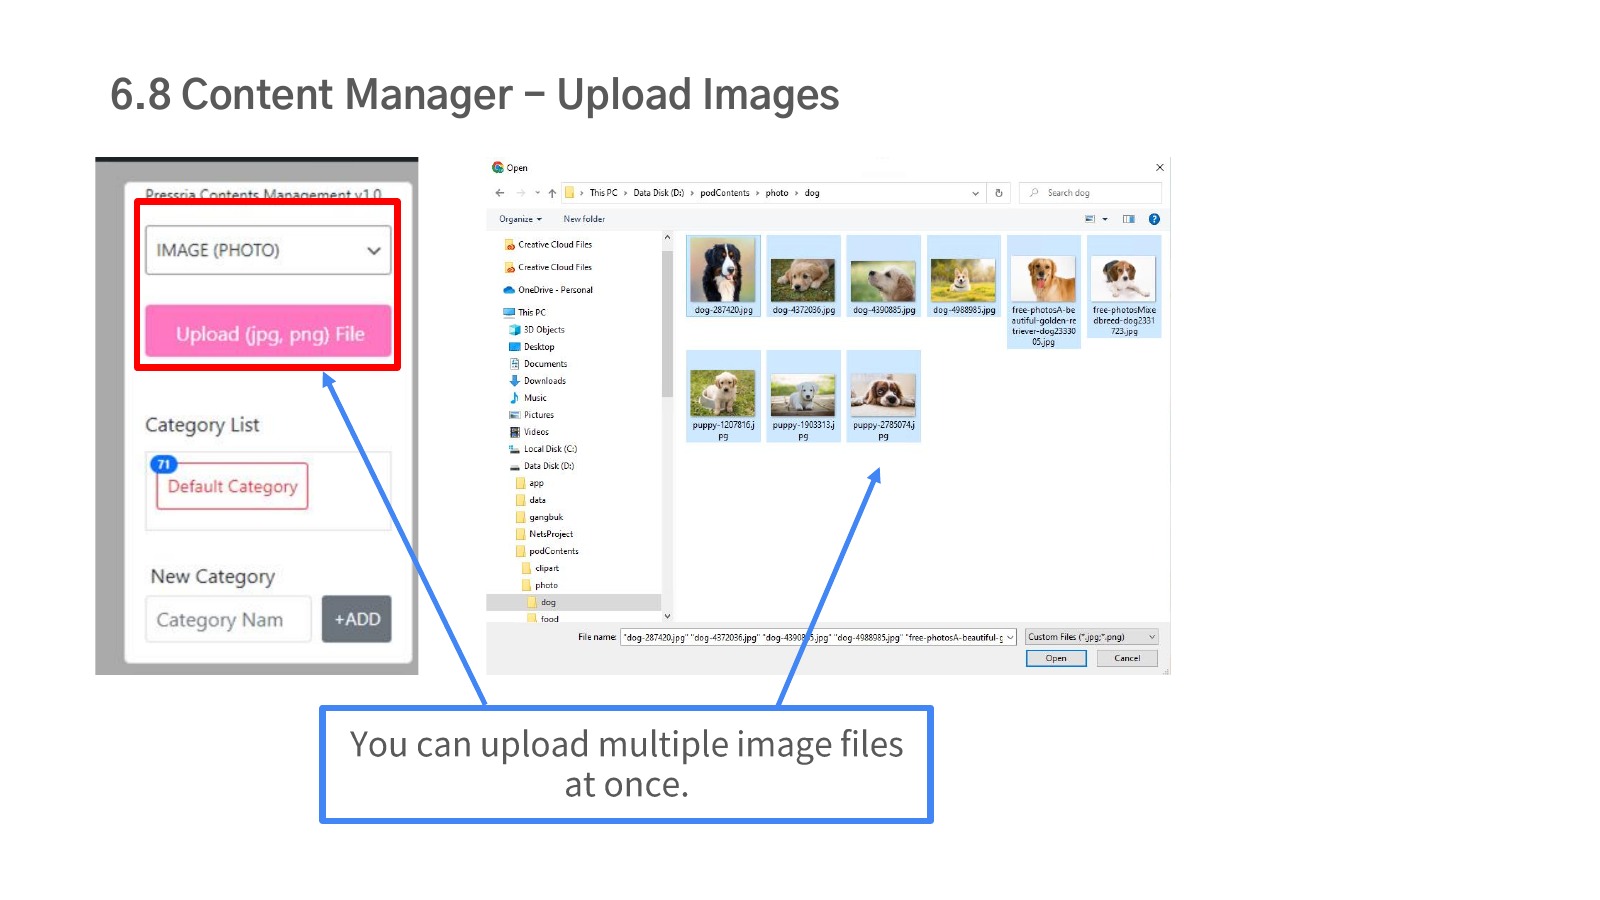
Under the IMAGE (PHOTO) category, you can upload several jpg/png images at once.
Clipart can be a Compound Path, a Path, or a Group. Group each clipart item so several can be uploaded together.
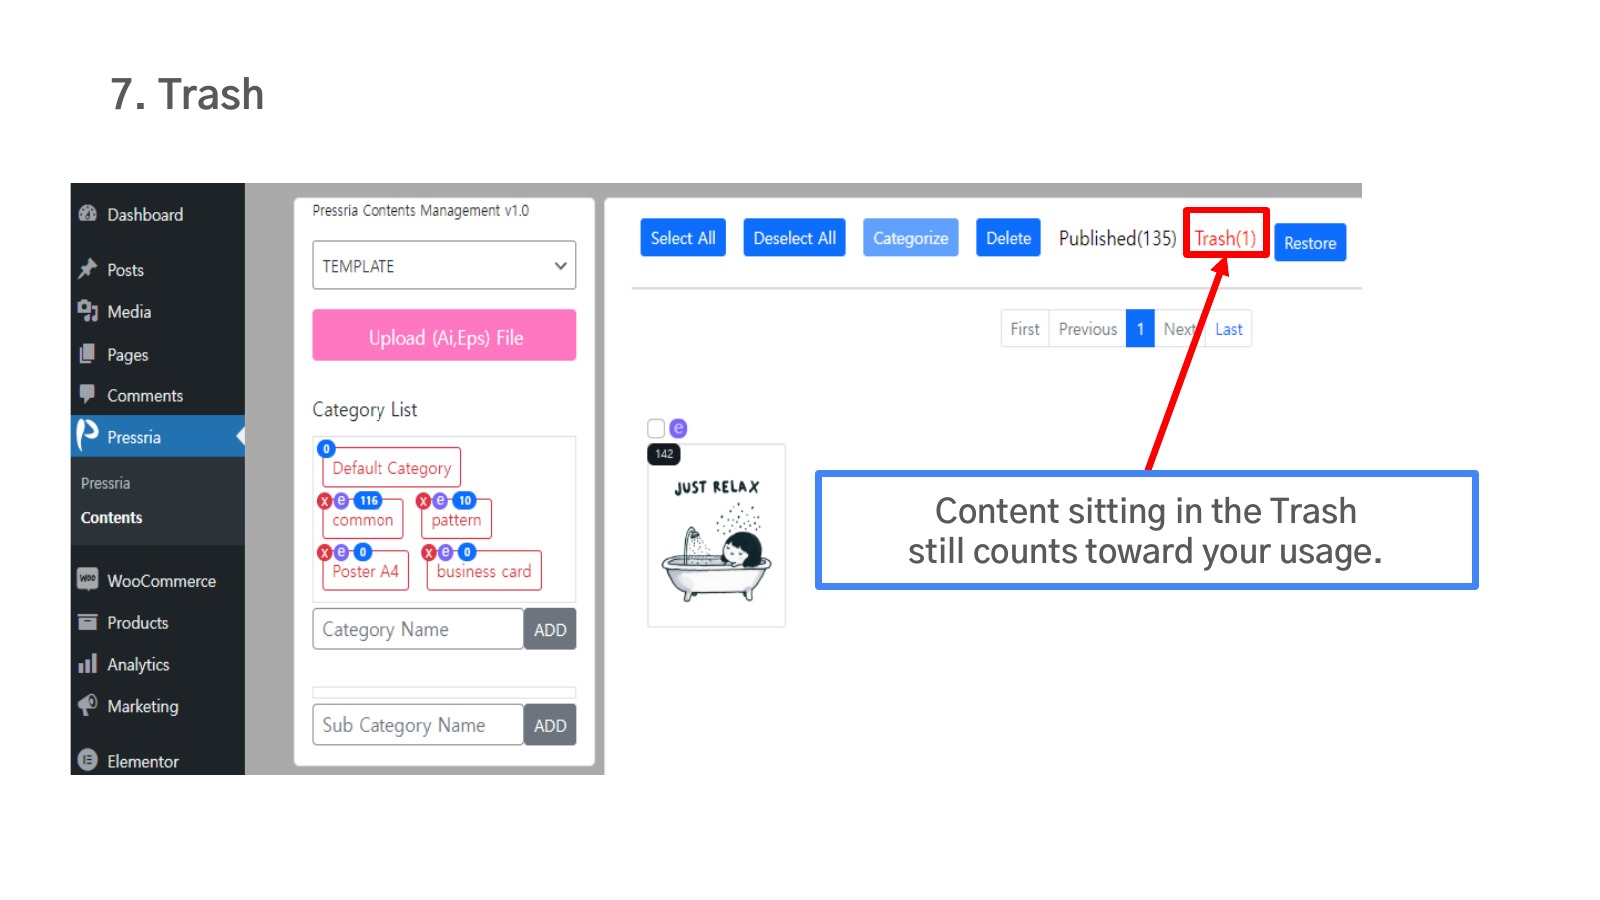
Deleted templates, text, images, and clipart move to the Trash. Content sitting in Trash still counts toward your usage, so permanently delete anything you no longer need.
Search orders by date range or order number, then click the PDF icon to download the print file. Products with multiple sides show one download icon per side.
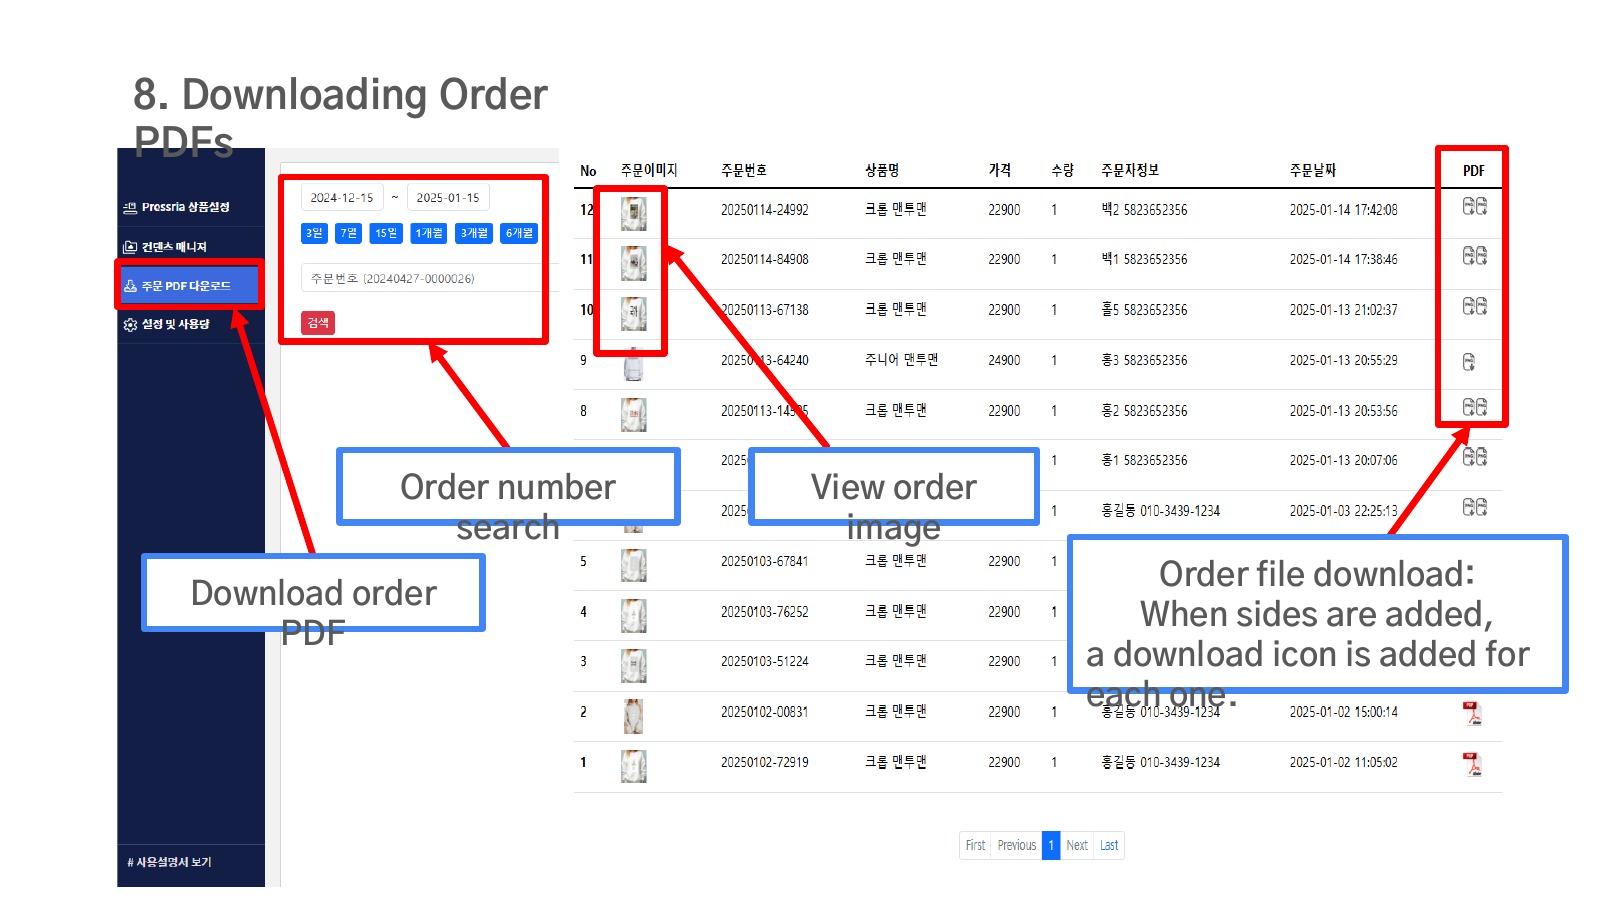
Note: screenshots are captured from the Korean admin interface, but every instruction on this page is in English.